Archive for the ‘Videos’ Category
Friday, September 2nd, 2011

At first glance, Guitar Apprentice looks an awful lot like music interactive games such as Guitar Hero and Rock Band, but as the slogan for the software reads, “This ain’t no video game”.
Arriving this past Tuesday, August 30, Guitar Apprentice is an interactive learning program that allows beginner guitarists to learn the instrument while playing classic Rock ‘n Roll songs like “Shine”, “Sharp Dressed Man” and “Can’t Buy Me Love”. Following blockbuster results and rave reviews at this year’s Summer NAMM, Guitar Apprentice gives guitarists an entirely new approach to learning guitar. It combines the technology of video gaming and interactive player components with the use of your very own guitar, set to different skill levels.
Beginning players can now pick up their very own guitars and learn how to play, while engaging in an on-screen environment that supplies a fast, easy and fun instructional platform. The video system takes the guitar part of hit songs and breaks them into easy portions on multiple levels so that they are as painless and fun to learn as a video game.
On the lowest level, the player only plays a portion of the guitar part, while Guitar Apprentice plays the rest. The player gets to rock out with the entire song by playing only a few chords. As the player improves he moves up through the different levels playing gradually and increasing portions of the guitar part. By the time the player reaches the highest level, he is playing the entire song and ready for the stage!

At GuitarApprentice.com, consumers may download the free trial song of the week or subscribe to the entire catalog. New songs are added weekly and already includes hits like “Boom,” “Hit Me With Your Best Shot,” “Shine,” “You Really Got Me,” “Sharp Dressed Man,” “Taking Care of Business,” “Get Back,” “Hey Jude,” “Can’t Buy Me Love,” “Independence Day,” “Please Remember Me” and “Mountain Music.” Can’t read music? The on-screen display is easy to decipher regardless of your knowledge of sheet music.
While video games like Guitar Hero and Rock Band can be fun, the reality is that these simple music interactive games cannot captivate the “real thing” and toy plastic guitars will never allow you to reach your dream of being a rockstar. Meanwhile, Guitar Apprentice has that potential. The younger generations obviously enjoy games like Guitar Hero so why not transform that into an experience where you learn in a similar environment with an actual guitar?
We think it’s a genius concept and if you are looking for a refreshing way to learn guitar (while playing some of the biggest hits in the industry) you need to check out Guitar Apprentice. Get all the information at GuitarApprentice.com.
Posted in Courses, Guitar, Learn Guitar Online, Videos | No Comments »
Sunday, August 21st, 2011

Rhythm guitar is a technique and role that performs a combination of two functions:
- To provide all or part of the rhythmic pulse in conjunction with singers or other instruments
- To provide all or part of the harmony
As a result, rhythm guitar traditionally requires the guitarist to hold down a series of chords with the fretting hand while strumming rhythmically with the other hand. While everybody likes to play lead guitar, most bands need at least one rhythm guitarist (often more) and mastering rhythm guitar is easier than mastering lead guitar therefore allowing you to get into performing sooner. Also, if you want to sing and play guitar you will more than likely play rhythm guitar while singing.
In order to learn to play rhythm guitar you must understand these basic concepts:
- Power Chords
- Straight 5ths
- Drop D Tuning
- Drop C Tuning
- Palm Muting
- Traditional Barre Chords

Power Chords
Power chords, like the name implies, provide a lot of energy for modern day music. The good news about power chords (also called “fifth chords) is they are very easy to play because the structure of the chord only requires the root of the chord and the fifth interval. Power chords are usually played on the electric guitar with distortion. They are a very popular element of rock music.
Straight 5ths
Straight 5ths represent a less common, but nonetheless useful power chord in your quest to master rhythm guitar. Straight 5ths is essentially playing two strings on the same fret. As a result, the straight 5th provides the rhythm guitar with a more “deathly” sound.
Drop D Tuning
Some guitarists tune their E string down to D so that they can play power chords. Believe it or not but Drop D tuning has been used from Van Halen to Led Zeppelin and provides a deeper, darker sound. Thus, it’s very popular with metal bands.
Drop C Tuning
Even heavier than Drop D tuning, Drop C tuning is a notorious rhythm guitar technique for metalcore bands such as Killswitch Engage and As I Lay Dying. Drop C tuning requires you to not only tune the lowest string to C, but all other strings down one note as well.
Palm Muting
Palm muting is another technique used often in metal. Any song that features an endless stream of grinding, chunky rhythm notes between the chords is what you would define as palm muting. Learn more about pulling off palm muting HERE!
Traditional Barre Chords
Traditional barre chords is a type of guitar chord, where one or more fingers are used to press down multiple strings across the guitar fingerboard (like a bar pressing down the strings), enabling the guitarist to play a chord not restricted by the tones of the guitar’s open strings. Barre chords are also referred to as “moveable” chords.
Posted in Courses, Guitar, Learn Guitar Online, Videos | No Comments »
Wednesday, July 13th, 2011

If you’re going to play guitar you might as well play loud, right?
Mastering heavy metal guitar is a highly admirable trait especially if you are a younger guiartist. Heavy metal is not the most strict genre in terms of having a lot of rules, but you need to make sure it’s loud and you need to play it fast. Consequently, heavy metal guitar is very demanding because the guitarist is often moving at a very quick rate.
Do you dream of mastering heavy metal guitar?
Let’s start with a little background. Heavy metal is a sub-genre of rock music. Metal first became big in the late-1960s and early 70s largely in the United Kingdom and United States. Heavy metal has roots in blues rock and psychedelic rock but is characteristically thicker sonically. The genre is also symmonious with amplified distortion, emphatic beats and a guitartist’s paradise — extended guitar solos.
Legendary bands like Led Zeppelin, Black Sabbath and Deep Purple are all associated with metal though the genre really came into its own when Judas Priest dropped a lot of the blues influence and made metal what it is today. Other pioneers in metal music include Motorhead and Iron Maiden.
Today, heavy metal is generally divided into two categories — the more popular, commercial-friendly metal (e.g. Metallica) and the more extreme/aggressive underground scene (Mastadon, Rammstein & Lamb of God). Unlike other genres, “metalheads” are usually pretty picky about what is classified as metal and what does not deserve to be associated with the genre. This could be related to the large number of heavy metal side-genres including thrash metal, death metal, black metal, nu metal, metalcore, extreme metal and hardcore punk.
The keys to becoming a heavy metal guitar master include:
- Proper Tuning
- Powerchords
- Palm Muting
- Hard Hitting Riffs
- Fast Solos
Heavy metal music involves a lot of distortion and fast fingering making the genre a difficult one for beginners. If you just started picking up the guitar it’s important to begin with some basics (even if you’re ultimate goal is to play metal) because the genre is not terribly easy to master.

When you play heavy metal you need the proper tuning. Traditional tuning for heavy metal guitar include:
- Drop C
- Drop B
- Normal tuning down a tone
NOTE: Tuning with an electronic tuner is recommended because these tuning styles are difficult to get by “ear”.

Heavy metal sounds the best with a TON of distortion. Therefore, it’s important to have a powerful amp because cheaper amplifers will probably not provide enough “juice” to really capture the meaty and raw sound of metal music.
The general formula for heavy metal features the use of heavy powerchords (traditionally during the verse, bridge and chorus) with a lot of open soloing. When you’re not soloing you’re probably playing powerchords. The good thing about powerchords is that they are easy to play. However, they will not get the effect you need unless you have a quality amp with lots of distortion.
Palm muting is a very important technique to learn if you want to master heavy metal guitar. In order to palm mute you must place your palm near the bridge. “Light palm muting” is when you slightly touch the stings while “Heavy palm muting” is, you guessed it, with much more pressure.
The vast majority of guitarists who want to play heavy metal do so because they are drawn to the intense solos of the genre. Can you really blame them? In order to do fast solos you obviously need fast fingers. You will develop speed picking and apreggios over years of practice. Be patient!
Along with all of the above tools, hammer-ons and pull-offs are both used heavily in heavy metal. The more practice with these two techniques the stronger your heavy metal skills.
If you are a beginner who loves heavy metal do not get frustrated. You will master heavy metal guitar before long. Like a lot of genres, heavy metal takes some time to learn, it’s heavily (no pun intended) recommended that you learn guitar basics first and invest in the proper equipment to really get that sound you need. It will not happen overnight but the avenue to becoming the next heavy metal guitar legend is only a few years of practice away!
Posted in Genre, Guitar, Heavy Metal, Videos | No Comments »
Monday, June 6th, 2011

Ever heard the saying “a moment of pleasure lasts a lifetime of pain”?
Okay, it may not be the most appropriate slogan for beginner mistakes on guitar, but with just enough practice of poor habits and you guessed it…they’ll last a lifetime. Unless, of course, you learn the guitar the right way in the first place.
If you played sports growing up you probably remember your coach stressing — fundamentals, fundamentals, fundamentals. Chances are you hated this term after awhile because it usually represented something that was boring, mundane and completely unnecessary. Consequently, you probably asked the question what’s the point of fundamentals?
Similar to sports, the best guitarists began with fundamentals and then eventually progressed to more complicated skills. You can’t dunk before you shoot and you can’t master the guitar before you learn the basics. Avoid the common beginner mistakes (below) and your possibility of playing with bad habits for a lifetime will cease to disappear.
I’m a Master Guitarist from Day One
Mastering the guitar will take a lot of time.
If the above statement is not obvious then perhaps you should reassess your goals. Regardless of your age, learning the guitar takes time. Some are a little quicker learners, but you need at least six months to a year to even begin to realize the potential of the guitar.
Stick with it, start small, start simple.
I’m too Impatient to Learn Guitar
Impatience has an awful lot to do with why some expect to master guitar from day one. Unfortunately, as technology becomes more sophisticated and quicker, humans are losing the virtue of patience. The guitar, however, has not progressed at the same rate and learning the instrument is much like it was ten, twenty and even a hundred years prior. Today, more information and guitar resources exist but the method for learning guitar is pretty much the exact same.
If you have the patience, exercise it fully. If not, you better learn to get some. Of course, having a natural desire to play guitar always helps as we naturally have a tendency to stick with a subject that we’re passionate about to begin with.
One Chord at a Time
If you just started learning guitar you have probably already heard about how important chords are to mastering the guitar.
Unfortunately, a lot of beginners only want to master one chord before moving on to the next. Big mistake. It’s important to learn (and master) the major chords, but not practice them one by one. Instead, learn three to four different chords and experiment shifting between chords with a metronome. At first, this will be very frustrating but over time you will master fingerings much faster and strengthen fingers. The result is a better guitarist.
Forget the Pinky
Throughout the day, regardless of the activity, how often do you use your thumb? Index finger? Pinky?
We have ten fingers, five pairs of each, and humans almost always neglect the power of our pinkies until we understand how important they are to the hand. Pinkies are not only helpful with day-to-day chores but also playing the guitar.
Naturally, when you first start playing almost all guitarists will find that fretting with the index and middle finger are easiest while the ring and pinky finger lack the same strength. In order to solve this dilemma practicing every day will slowly built up finger strength on all four fingers of the left hand (assuming you’re right handed).
However, you can take things a step further by focusing on one simple practice technique. Whenever you play, your fingers should be hovering over the strings of your guitar ALL OF THE TIME. Therefore, when you form a D chord your pinky finger should be hovering somewhere over the high E string or B and likewise for all other chords.
Music Theory, Who needs it?
Music theory is a lot like fundamentals. Boring at first, but completely vital to fully learning (and understanding) the guitar.
Aside from the basics of What is a Scale? What are major and minor chords? What is rhythm? Harmony? — Beginners can also learn a lot by understanding the root note of a chord. The root note is the bass note. It determines which string you should start strumming or picking from and is important for not only learning chords but understanding the relationship between you and the bassist.
Posted in Guitar, Videos | No Comments »
Tuesday, May 31st, 2011

Jazz is one of the most important and influential genres of music that was EVER created. From its origins in the beginning of the 20th century to present day, jazz music has not only made an impact as a genre but also influenced American popular music.
Therefore, jazz’s West African pedigree is evident today with its blue notes, improvisation, polyrhythms, syncopation and the swung note. Guitarists who desire to learn jazz guitar will ultimately learn about several subgenres of jazz music:
- 1910s — New Orleans Dixieland
- 1930s and 1940s — Big Band Swing
- mid-1940s — Bebop
- 1950s and 1960s — Free Jazz
- 1970s — Jazz Fusion
- 1980s — Acid Jazz (include Funk & Hip-Hop)
- 1990s — Nujazz
Think about it. What other genre of music do you know that has been around since the 20th century in America, spread around the world and its aesthetics adapted to varied environments and many different distinctive styles?
If you want to be a great guitarist it’s only natural that you want to master jazz guitar. What do you need to know?
Guitar Scales
The Modes
What are modes? How do you play them on guitar? What do they have to do with improvisation?
The Bebop Scale
The bebop scale, a technique first used by Charlie Parker and other pioneer bebop musicians, is at the foundation of jazz music. Learn the Bebop scale and you’ve made the first step toward mastering jazz guitar.
The Lydian Dominant Scale
Tritone substitution is a common substitution for dominant chords. The lydian dominant scale is the scale you can use to improvise over such chords.
The Pentatonic Scale for Jazz Guitar
The pentatonic scale (or blues scale) is usually the first scale you learn on the guitar. Learning about how groundbreaking the pentatonic scale is not only important for mastering jazz guitar but music in general.
Pentatonic scales are often used to do a guitar solo in blues, rock and pop music, but they are also very useful in jazz.
The Altered Scale
The altered scale is used to improvise over dominant chords with altered extensions.
Chromatics
Ready for that “jazz sound”? Chromatics allow you to put some jazz into your guitar scales
Minor Blues Guitar Scales
There is always a major scale and a minor scale. Look into some of the more important minor blues guitar scales to understand the basic concepts of jazz.
Exotic Guitar Scales
What are exotic guitar scales? If you really want a challenge look into Arabian, Japanese, Oriental, Jewish, Indian, Gypsy and other exotic guitar scales.
Dissononance, Note Enclosure & Resolution
What is dissononance? Resolution? Note enclosure? Find out how these musical elements will allow you to master jazz guitar, particular solos.
Guitar Arpeggios & Jazz Patterns

Arpeggios
What exactly is an arpeggio? Furthermore, how would you classify a jazz guitar arpeggio? Understanding arpeggios and how they directly relate to jazz guitar is essential to the experience.
Jazz Guitar Patterns
Patterns are small melodic or rhythmic building blocks for your guitar solos and phrases.
Triads Over Minor Chords
Create interesting melodic phrases on minor chords by alternating triads. The result is a more diversified sound.
Jazz Style
As previously mentioned, there are several different styles of jazz. Do you want to master Latin guitar? Bebop? Master jazz guitar in general. A few of the vital subgenres of jazz:
- Bebop
- Gypsy Jazz Guitar
- Jazz Blues Guitar
- Latin Guitar
Guitar Technique & Practice Essentials
If you really want to master jazz guitar it’s going to take some time. Thankfully, a ton of phenomenal resources exist on the Web. Of course, you can always check out one of our top rated guitar courses to really learn jazz guitar HERE!
Stay disciplined with great practice techniques (warm-up exercises, finger stretching exercises, timing drills) and you’re well on your way to learning jazz guitar. If you love jazz music then you have the necessary interest to stay the course and one day learn to play your favorite songs!
Posted in Guitar, Jazz, Scales, Videos | No Comments »
Saturday, May 7th, 2011

Unless you’re playing an acoustic show alone, the beautiful thing about live music is that it almost always consists of multiple people playing multiple instruments.
Consequently, it’s easy for those new to music to get confused about who is playing electric guitar and who is playing electric bass. Both instruments, especially from a distance, look very similar. They’re both string instruments, are composed of a body, neck and head and are played just about the same.
Let’s start with the basics:
Electric Guitar: A stringed instrument usually having six strings (non-standard 7-string and 12-string guitars also exist) with a sound that is amplified by electrical means.

Bass Guitar: A stringed instrument usually having four strings (non-standard 5-string and 6-string basses also exist) with a sound that is amplified by electrical means.
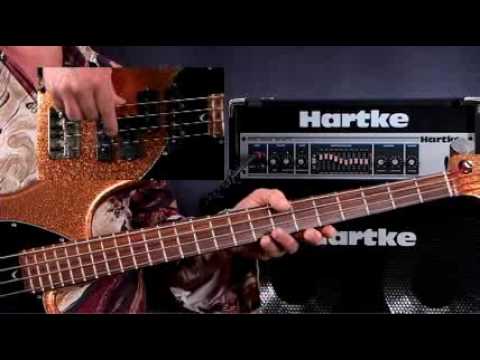
As a result, the very first physical difference you should notice between an electric guitar and the bass is the number of the strings. Additionally, strings of a bass are generally quite thicker.
Now, let’s examine the notes of each instrument…
Guitar (thinnest string to thickest)
1st string – E
2nd string – B
3rd string – G
4th string – D
5th string – A
6th string – E
Bass (thinnest string to thickest)
1st string – G
2nd string – D
3rd string – A
4th string – E
Did you notice that the last four strings of a guitar are the exact same as the four standard bass strings? That makes the bass practically the guitar minus two guitar strings, right?
Wrong.
The first string on a 6-string bass is actually equivalent to the sixth string of a guitar. Furthermore, if the guitar had a seventh string it would not be thinner, but actually thicker. Essentially, the missing seventh string would have the same exact pitch as the second string on a 6-string bass.
The contrast in the two stringed instruments is exactly what makes them so special when combined together. You may or may not not know that the guitar is generally used for two purposes — either to serve as lead guitar or rhythm guitar. Sometimes, a band has multiple guitarists with one serving as the lead and one or/more serving as the rhythm guitar(s).
The bass guitar traditionally works more with the rhythm guitar compared to the lead guitar, because the primary purpose of the bass is to aide the drums (and percussion) in the rhythm of the song. There are, of course, differences as certain bands (i.e. Primus) are actually regarded for their bass and often it almost takes the role of the lead in the song.
Thus, the bass guitar exists to:
- Provide the rhythmic foundation.
- Provide the harmonic foundation.
The bass guitar and drums work well together because they are usually designed to play a supportive role to create the pulse of the music (as well as set the song’s foundation). When is the last time you found yourself tapping your foot to a beat unintentionally? That is your instinct to vibe to the pulse, or beat of the music. Bass and/or drums create the pulse.
The Major Difference
Simply, the major difference between the guitar and bass guitar is the pitch range of the instruments. The bass guitar plays notes an octave lower than a regular guitar.
Music is an art and thus there are no rules. You will find that the bass guitar traditionally plays a supportive role in the band while the guitar (with it’s higher range) is more in the spotlight. However, some bands make the guitar more of a supportive instrument. Others, do not even have a guitar at all. Regardless, the two instruments are usually very critical and at the foundation of rock ‘n roll music.
If you are a guitarist, you can learn an awful lot from watching bass guitar lessons and conversing with bass players. The same is true with bassists.
Posted in Guitar, Videos | No Comments »
Friday, April 15th, 2011

If you have ever picked up a guitar you are likely very familiar with the name Van Halen, yet may not recognize the term “guitar tapping”. Why the comparison?
Well, if you love Van Halen music you are actually more familiar with the guitar tapping technique than you might think. In fact, if it was not for the late-1970s and Eddie Van Halen the guitar world may not be quite the same today.
Van Halen is a master with fretwork and when he does pass away, the guitar solo for “Eruption” might arguably go down as his greatest contribution to rock music. The solo is worth noting here because it serves as the original groundwork for the guitar tapping technique. If you understand how that solo is pieced together then you will also understand why you can really do some unique things with guitar tapping and how it works.
First, we should let you know that the term “tapping” is definitely misleading. It’s a generic term for fretting notes with your right hand (or picking hand)* and not, like you often hear with some of the best bass players in the world, an advance technique where you actually slap the instrument.
What the guitarist is really doing is using the picking hand and its fingers to “tap” on a note with advance techniques like hammer-ons and pull-offs. You’ve probably heard of basic hammer-ons and pull-offs (if not, introduction below) but now you’re just doing them with your alternate hand.
Hammer-Ons
Hammer-ons (like pull-offs) is simply an alternative way of playing a note without re-picking to play another note on a higher part of the same string. It’s basically the old analogy of “kill two birds with one stone”.
TRY THIS: First, fret the second fret on the third string with your first finger. Next, position your third finger just above the fourth fret on the third string but make sure it’s not quite touching.
Pick the string, then, without picking, place the third finger firmly on the fourth fret. If you do this with enough force the note on the fourth fret should sound. Pretty cool, right?
Like anything, this will take a few days to get down so practice, practice, practice!
Pull-Offs
Pull-offs are pretty much the complete opposite of hammer-ons. You can do pull-offs by either A) Angling your hand parallel with the neck and pulling off in a downward motion or B) Angling your hand perpendicular to the neck as if playing the piano and pulling-off in an upward motion.
First, put your third and first finger on the third string. Fret the first note with your third finger and second note with first. Play the string with a pick and then remove your third finger while performing a subtle downward tug with the same finger. Listen carefully! Did you hear the note the first finger is fretting “ring out”? If so, great.
Again, practice until you can play pull-offs without the ring stopping after you remove your finger.
Time to Experiment…
By now you should have noticed that with a little practice the number of variations with hammer-ons and pull-offs are virtually endless. Best of all, change it up with the picking hand and the possibilities become even more diverse!
As a result, you can do a ton of experimentation and I don’t know about you, but nothing is better than experimenting with your guitar. As always, understanding scales (which serve as the basis for all music knowledge) is a great place to start with multiple hammer-ons, pull-offs, etc.
*-left hand if you’re left handed
Posted in Genre, Guitar, Learn Guitar Online, Rock, Videos | No Comments »
Monday, January 31st, 2011

Surf various guitar websites and/or frequent message boards and you will find a big fat myth related to the acoustic guitar. The Web (for all its wonders) has a lot of misleading information and downright lies, but because anyone can purchase a domain and post some content, they are mistaken as creditable resources.
The big myth that I am talking about today is acoustic guitars and how a lot of people seem to be under the assumption that it’s a completely different instrument when compared to the electric guitar. In reality, the tone is much different (obviously), but that’s about it!
If you actually believe that there are certain things you can play on electric but not acoustic, you are wrong. Truthfully, the acoustic and electric guitar are very much the same and just about anything you can do on electric you can also play on acoustic. In the end, the primary roadblock that prevents most from accomplishing (and therefore thinking) that the two are different instruments is because the acoustic guitar is not properly setup.
Make sense?
GuitarSetupGuide.com has some wonderful resources on the proper setup of an acoustic guitar. Common acoustic troubleshooting like how to play bar chords, scales, riffs and soloing are all addressed in detail. Here, for example, is one of their videos on dealing with a common issue — the location of the action.

If you have never played a guitar before and are currently stuck between electric or acoustic, I should note that while some may say it is harder to learn on acoustic that is not necessary true. With the right setup (as introduced above), beginners can learn just as well on acoustic guitar as electric.
In fact, the grand battle between electric and acoustic comes down to your own personal style and budget limits. Yes, acoustic guitars have larger bodies and necks. Some individuals will also note that they have an easier time pressing down on electric guitar strings when compared to acoustic.
In the end, the size of your budget may make the final decision. If so, you’ll likely settle with acoustic guitar since they are generally slightly cheaper. While it’s never good to just opt for the cheapest route, if you really do want to learn to play an acoustic guitar there are a variety of outstanding resources available. Always heed to proper guitar setup and you should be good to go!
Shopping for an acoustic guitar? Check out the Top 10 Beginner Acoustic Guitars.
Posted in Guitar, Videos | No Comments »
Monday, January 17th, 2011

They say that exercise not only produces a healthy body but also fuels a healthy mind. The same could be said about your strumming habits.
Yes, a lot of guitar guides, courses, etc spend a lot of time on your left hand (assuming you’re a natural right) and what it takes to belt out clear notes, crisp chords, strong bends and the plethora of other skills that you will need to become an advanced guitarist. Although that is all very important, your right hand, the strumming hand is also vital.
Think of it this way. You could be exceptional with the various scales, quick at locating the key note and sharp with even the most difficult chords but if you have trouble strumming quickly or picking the right string, truly all of that practice is in vain.
As a result, you’re very first days on the guitar should be spent with a heavy emphasis on strumming patterns and exercise. Practice this stuff daily because it is one of the core fundamentals of the guitar. However, even an advanced guitarist (assuming that he is wise) should simply take five minutes at the beginning of each session to do a few mindless strumming exercises. Why? Because it does not become “mindless” until you have practiced it a lot and continue to maintain it regularly.
Excellent Strumming Exercises: String Acquaintance
Beginners, your first duty is to locate a reliable guitar tuner (you can also tune by ear, but much more difficult). Then, tune the instrument. Once fully tuned, proceed to touch each string with your pick and name off the string name. If you have no idea what the string is called, reference this phenomenal visual.
It’s important that you not only learn the string names but also the sound. Once you have mastered the names, begin at the top with the low (or heavy) E string. Pluck it once. Listen closely to its ring. This is the correct sound (assuming it’s properly tuned) for what we call the “open D”. Pay attention because every once and awhile you’ll incorporate an open string or two into a chord.
Excellent Strumming Exercises: Open Strings, One Count Notes
The next step in the progression is to be able to switch between strings when needed. This exercise will develop flexibility and control of your plectrum.
Strum each open string four times. Then, move down to the next string and repeat. Begin with the low E and conclude with the high E. Start off painfully slow and increase speed with confidence. Play with a backing track or metronome if preferred.
The goal is to eventually create enough confidence that you can easily switch between strings on the fly.
Excellent Strumming Exercises: Varied Rhythm, Same Note
Next, I want you to place your middle finger behind the second fret on the fourth string (or A). For this next exercise, the note will remain the exact same but you will strum the string at a varied rhythm.
Feel free to mix and match but a good starter rhythm is to strum two full counts (count of four before strumming again) followed by two half counts (count of two before strumming again), followed by four quarter counts (count of one before strumming again).
You will note that the pace of the strumming obviously picks up as you move along. Once you feel comfortable strumming to a varied rhythm like the one above you should attempt to really play a complex rhythm like:
2 half-counts, 1 full-count, 2 quarter counts, 1 half count, 1 full count, etc, etc etc.
The rhythm does not really matter so long as you’re strumming and strumming to a purpose.
Moving forward…
As you can see, you could virtually create hundreds of different strumming exercises simply by changing the strings, notes and/or rhythm. As you become more advanced, so should your strumming patterns. Be sure to practice these daily in order to constantly improve!
Posted in Fingerstyle, Guitar, Videos | No Comments »
Monday, December 6th, 2010

What always has been and always will be attractive about the electric guitar is how cool it looks on-stage. Yeah, some people may argue that the lead singer is “coolest” guy in the band but I beg to disagree. Of course, us guitarists may be a little biased but at least we play an instrument (assuming you do not sing and play guitar).
Therefore, when you have mastered the basic fundamentals of the guitar you may want to add some really sweet guitar tricks to your arsenal — especially for that next live performance (or just to show-off in front of friends).
While some of the skills below are somewhat easy to learn (and look really cool when executed properly), we cannot stress the importance of first learning the basic fundamentals of the guitar! You would not attempt to dunk a basketball before you have first learned to shoot a jump shot and you should not expect to make such a profound leap with the guitar either. With that being said, if you think you’re advanced enough, let’s move on to some really sweet guitar tricks!
Artificial Harmonics Effect

Whenever a guitarist lightly touches the string at specific positions on the neck and then plucks the string they are creating what we like to call “Artificial Harmonics Effects”. When you incorporate this subtle but dynamic guitar trick you in turn create a bell-like quality thanks to the simultaneous vibrations of both sections of the string.
In order to pull off artificial harmonics you need to have some hand-eye coordination because the right hand performs the light touch and pluck simultaneous with the string being fretted by the left hand. Consequently, you have a lot going on for a few simple notes but it’s pretty cool when you do it right.
Double Harmonic Trem Drop
Do not get intimidated by the long name. When you double harmonic trem drop all you’re really doing is hitting two pinched harmonics simultaneously and then dropping the tremolo bar. The effect is a twisted in-and-out phase in which one sound goes off while the other comes back down.
Horse Effect
Basketball is not the only game that can play H.O.R.S.E. because the guitar has a really cool guitar trick called the “Horse Effect”. Made famous by guitarists like Steve Vai, guitarists deploy the special effect by fretting the natural harmonics at the second, third, fifth, seventh and twelfth frets. Then, by using the tremolo bar, advanced guitarists press down on the bar to create a high pitched whinnying sound.
Dropping the Bar Down E Trick

This trick should probably be renamed “The Jimi Hendrix Experience” because the legendary guitarist is allegedly the first ever to perform it. It all depends on who you ask but regardless, dropping the bar down E trick is really sweet thanks to the end result of a “squealing sound”. In order to pull off Jimi’s move, pick the string and then lightly touch it with the thumb.
Funky Licks
This cool guitar trick is no laughing matter. The funny lick can be used to either jazz up a funky/fusion style or add contrast to guitar solos. Regardless of the purpose, expert guitarists use funny licks to break up the monotony in an otherwise bland verse or solo. The ultimate goal of funny licks is to utilize chromatic notes and rhythmic displacement.
“Your Name” Trick
What’s so sick about the guitar is that you can never stop learning. You may really love to discover guitar tricks and that is great! Explore all that guitarists have introduced and last but not least, do not be afraid to explore a little. Who knows, you may completely invent something new!
Posted in Guitar, Learn Guitar Online, Videos | No Comments »
|