You were about to hit that last chord, and you noticed that something didn’t sound right. Again, you’re guitar is out of tune. Before you rush to that self-consumed, keeps-everything -to-himself dude you met at your local jamming session (yet again) and ask him to tune it for you, consider learning to do it on your own. It’s easy and you won’t have to drag your Fender Stratocaster with you out of the house. In the next few minutes, you will be able to successfully tune a guitar.
There are a couple of things that you need to remember toget a guitar tuned. First, always start off with “E” which is known as the thickest of all strings. It will make the guitar tuning a lot easier. It’s also called “6.”
Next is the “E” pitch- for some this is a standard pitch. However, not all of the guitarists religiously rely on it. It will still depend on your taste as a budding musician. Some guitarists prefer the “E” string to be a pitch higher than usual. Remember to adjust the guitars tuning keys carefully and gradually. This is to avoid any accidents caused by the strings snapping due to unnecessary tension.
So let’s begin.
There are varying ways on how to tune a guitar. One of the methods is by using a pitch pipe, or the more expensive electronic tuners. Pitch pipes generally sell for around $5 to $10 (depending on the make and brand) and electronic tuners for about $99 to $120.
Using a Pitch Pipe, you begin by blowing on the one marked with an “E,” and then adjust the “E” string or “6” to match the pitch. Once you’ve successfully matched the pitch, proceed with the succeeding strings A-D-G-B-e or 5, 4, 3, 2 and 1 respectively.
To check if you’ve tuned the guitar properly, hit the strings E and e, or 6 and 1. If the sound of the “e” string is harmonious with the “E” string, then it’s tuned.
You may also tune your guitar by using piano keys. You’ll find the E key by counting five keys from the left. This is your reference tone. You’ll notice that it has the pitch similar as the E on a pitch pipe and a Piano’s. Again, match the E string. The corresponding keys are as follows: the 10th key for the A-string, 15th key for the D-string, 20th key for the G-string, the 24th key for the B-string and the 29th key for the e. Almost a surefire system since pianos stays on tune even when not used for a long time.
JamPlay, besides offering guitar lessons, also gives you tips on how to tune a guitar.
Another method is through our dear friend the internet. There are websites that sport virtual pitch generators that will help you get a guitar tuned. Follow the same drill by matching the pitch with the corresponding strings. Try hitting a chord. Do you like how it sounds now? You’re all set then.
In order to play guitar you need a guitar. Simple enough, eh?
While learning to play guitar is as easy as that most guitarists learn the instrument more effectively by incorporating many of the wonderful guitar tools and accessories available. Some of the guitar accessories (below) are simple little tools like picks and guitar straps while others are more advanced like capos & slides and electronic tuners. Regardless, they’re all essential guitar accessories for learning guitar.
Guitar Case/Bag
If you just purchased a guitar you probably do not plan on playing any live shows for awhile, right? Consequently, why do you need a guitar case/gig bag?
Guitar cases and gig bags help protect the instrument and maintain peak performance. Even if you’re not ready to play live, you may take your guitar over to a friends or on the road while you travel. If you’re really focused on keeping your guitar in mint condition you can even store your guitar in the gig bag when not in use. Regardless, owning a guitar case/bag not only makes you look like a legitimate guitarist but helps increase the longevity of the instrument.
Guitar Picks
Most beginner guitarists will learn to play the instrument with a guitar pick. As a result, you can never have enough picks. Unfortunately, guitar picks are easy to misplace or lose so make sure you have a large assortment available.
The cool thing about guitar picks is that they are sold with all kinds of decorative art and make your guitar just that more personable.
Extra Guitar String
Always carry extra guitar string because you never know when a string might snap. It’s especially important once you begin playing shows. Until then, get in the habit of carrying extra guitar string. Its simple advice but important.
Guitar Strap
When you first learn the guitar playing while sitting down will probably feel more comfortable. Nothing is wrong with this approach but at some point you will probably want to play guitar standing up (think about it, when was the last time you saw a guitarist playing live while sitting down). Consequently, it’s not a bad idea to mix up your practice routine by playing both sitting down and standing up.
In order to play guitar standing up you’ll need a guitar strap. The good news is that guitar straps are very affordable and some really sweet guitar straps exist with unique graphic art or color design.
Guitar Wood Polish (and other cleaning tools)
It’s important to regard your instrument as something you love (like a family member, friend). Therefore, never neglect your guitar! Your guitar needs some extra attention just like anything else. As a result, a lot of guitar cleaning products are available including guitar polish that you’ll need every once and awhile to shine up the body.
Invest in a few guitar cleaning products and maintain a regular schedule in order to increase the longevity of your guitar.
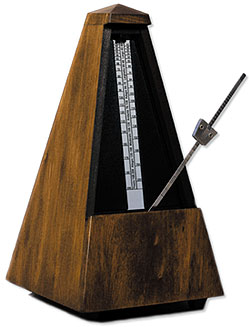
Metronome
It’s all about the beat.
You may not always have access to a good drummer, but you do have access to a metronome. In fact, you can grab a fantastic metronome for free online. Metronomes maintain a steady beat and assist you while you play the guitar. Do not forget to use a metronome.
Electronic Guitar Tuner
While several different ways exist to tune the guitar by far the easiest (and one of the most popular) is to tune via an electronic guitar tuner. Electronic guitar tuners are easy to use and produce an accurate result. They’ll cost a little money but be sure to invest in one. Also, once you start playing shows always bring a couple extra batteries because you never know when the tuner might lose battery power.
Congratulations! You’ve just invested in your first guitar!
Perhaps you have been saving for awhile and finally got that expensive Fender that you have always wanted? Or, maybe you’re like the vast majority of most beginners and decided to save a little cash and go with a cheaper priced instrument? Nothing is wrong with the later but you should know that if you pick up the guitar for the very first time and hear an awful buzzing noise it does not necessarily mean you bought a bad guitar.
Note: Of course, you can avoid this scenario almost entirely by testing out the guitar prior to buying and/or avoiding budget guitars sold at places like Wal-Mart and Target.
The reality is that most guitars require at least some set-up before playing, especially if they intend to use the instrument for one particular style. The first thing you should do with a new guitar is strum the open notes and check for any buzzing or muted sounds. If you do encounter such a sound, a nut is likely bad and will need to be filed down. While it is possible to fix this dilemma, we HIGHLY recommend you hire a professional.
Once the guitar passes the first test it’s time to tune the guitar. First, you must find out if the open note is tuned with a fretted note. In order to do this, test the open and twelfth fret notes of each string. They should sound the same. No dice? It’s time to adjust the intonation. Again, it is highly recommended that you consult a professional although (unlike filing down a nut) you are unlikely to cause any major damage to the instrument.
To adjust the intonation on most electric guitars you will need to tighten or loosen screws on the bridge to move each string’s saddle up or down. However, if you are using an acoustic guitar (or any other guitar with a non-adjustable saddle) you will definitely need to bring in the instrument as there is no way an amateur can fix this properly.
After your guitar passes the first two tests you must check for fret buzz. Fret buzz is when the strings are too low or the truss rod is improperly adjusted, resulting in a terrible buzzing noise.
Once again, the problem is fixable but this time you have a variety of alternatives. Some experts will advise you to try playing with an amp (as sometimes the fret buzz is not picked up) or play softer to hopefully eliminate the buzz. However, your best bet may be to try a heavier gauge string on the instrument. Talk to an expert to see what he or she recommends. Your very last resort is to adjust the truss rod.
Last but not least, a wise guitarist should polish, retune and restring the instrument. Consult your local music shop for a correct polish. Always buff with a dry, soft cloth. When not in use, store your guitar in a temperate, moderately dark and slightly humid area.
If you are a regular on GLC you will probably agree that most of the content on this blog deals with the actual guitar whether it be the instrument or ways to improve how it sounds when you play.
Admittedly, we probably do not spend enough time dealing with something that is NOT on the actual guitar but is very important to electric guitarists. As a result, today we’ll spend time examining the electric guitar amp, examining what all those little knobs do, if for example, you just bought a new guitar package this past week.
Electric Guitar Amp Settings 101
First off, let’s start with the definition of a guitar amp and what it actually does. The guitar amplifier (or ‘amp’ for short) is an electronic amplifier designed to make the signal of an electric or acoustic guitar louder so that it will produce sound through a loudspeaker. Beyond its basic mean of producing “louder” sounds amps can also modify an instrument’s tone by emphasizing or de-emphasizing certain frequencies and/or adding electronic effects.
Now that we have all the “big terms” out of the picture, the reason guitarists utilize amps is because the range of tone available is just so much greater. The guitar amp completely revolutionized rock ‘n roll because it brought a whole new spectrum to sound that musicians never thought possible.
When you first brought home your guitar amp you probably noticed that various knobs like “Treble”, “Middle”, “Bass” and “EQ” are situated on the front. You may have a basic understanding of what these settings do but if not, let’s define each term:
Treble – soprano; having or denoting a high range. Adjusting this setting will determine the amount of high end in your sound. Lots of treble equals a very sharp and crisp sound.
Middle — between the soprano and the bass, your middle control will impact the overall character of your sound. You could say that this is the most important setting. Little middle and you get that classic rock ‘n roll sound while higher mids equal a more blues like quality.
Bass — the low range is beloved by a lot of musicians and fans alike because it has that infamous deep, thundering quality. Most guitarists unanimously love a lot of bass but of course it always depends on personal opinion. NOTE: You may not get the full effect of the bass with smaller amps simply because they are just not equipped to handle the load.
EQ/Tone — this is your “overall” control. While Treble, Middle and Bass will ONLY adjust that particular range the EQ/Tone manages all your basic settings with one easy knob.
Additional Guitar Amp Settings
Every dependable amp should include the above settings but a lot of amps will also feature controls for distortion, chorus, reverb, etc, etc. If you have a solid understanding of Treble and Bass then distortion and reverb are just an added bonus. These types of controls are solely for guitar effects, allowing you to squeeze that sound exactly like how you intended.
Feel free to play around with those settings but always master the basic guitar amp fundamentals before getting too far ahead. As is the case with anything, cheaper amps will probably have less settings and not sound as good (especially when played loud).
If you bought a guitar package (guitar, amp, strap, picks, etc) you likely ended up with a practice amp. These small amps are great, like the name implies, for practice but do not sound exceptionally well when the volume is above a normal level. It’s a great starter tool but overtime most guitarists will eventually upgrade.
Experiment with your Guitar Amp
Have you ever watched an elderly individual attempt to use a computer for the first or second time? If so, you will probably observe that they are very timid and constantly afraid that one wrong click will “break” the entire computer. Of course, anyone who has used a computer knows this is silly but basically it comes down to that age group not being very familiar with the product and thus scared to use it.
The same could be said about guitar amps. At first, you may not want to mess with the amp settings too much because it could do harm to the machine or others might wonder what in the hell you are doing. In reality, nothing could be further from the truth. The only way you will really know what your amp is capable of doing is by experimenting with its settings. Play with the controls and have fun!
As a general rule of thumb, always starts with ALL dials pointed at 12 o’clock and work from there. Take notes if you find such a practice useful. Over time, you will learn which settings you like best and for what situation. Then, it really becomes fun because you do not have to do as much thinking and rather focus on the creativity of producing new music.
If you’ve been watching television of late you can probably testify to the abundance of Christmas ads. And if you’re someone who takes pride in being up-to-date on the latest electronic products you can also probably testify to easily one of the hottest gifts of Christmas 2010 — the Apple iPad.
I know my favorite iPad commercial is the one in which Apple quickly highlights many of the iPad’s incredible features including (drum roll please) the ability to hook up your electric guitar and use the small device as an amp!
Pretty cool, right?
What’s also great about any Apple product is the ability to download apps, many of which are free. So in celebration of the new iPad and that guitar amp feature, we thought ’tis the season to highlight some of the best guitar apps on the market.
Check it out…
ChordBank for Guitar
Everyone likes stuff that’s free. Consequently, ChordBank is awesome because you get access to over 1,300 guitar chords for the price of nothing. That’s zilch, zip, nada. Strum to hear any chord played out loud or pluck individual strings to pick out individual notes. It’s all there with 22 complete fingerings.
Free!
Gibson Learn & Master Guitar
You may recognize Learn & Master Guitar, one of GLC’s top five rated guitar courses available. You may also recognize Gibson guitars, arguably the most famous guitar manufacture in the world. Together? They form quite a potent combination — the Gibson Learn & Master Guitar.
This application provides you with essential tools to help you become a better guitar player as well as free full length lessons from the award winning Learn & Master Guitar.
Free!
PocketGuitar
Don’t own a guitar?
PocketGuitar is a good place to start. It will transform your iPhone or iPod touch into a virtual guitar. Users can press and strum strings and when they get tired of being the next Slash, of course you can always jam out with the electric bass or ukulele. PocketGuitar also has some really sweet distortion effects as well.
$0.99
Fret Surfer Guitar Trainer
The Fret Surfer Guitar Trainer is seriously worth noting (no pun intended). For the price of $3 (less than a bottle of water these days), owners can learn every…single…note on the guitar. It’s a great resource with tons of customizable features.
$2.99
GuitarToolKit
GuitarToolKit features both a stellar reputation (very highly rated on iTunes) and loads of killer guitar utilities. The tuner is amazingly accurate and you also get a library of over 500,000 chords.
$9.99
Do you agree with our list? If not, what fantastic apps can you add?
In celebration of the holiday, GLC wanted to examine some absolutely HORROR-iffic bad guitar habits that will transform your potential to be the next Jimmy Page into nothing more than a Guitar Hero high scorer.
FADE IN:
LITTLE JIMMY practices his guitar. The instrument is beautiful. Something that has been preserved with great care, beautiful, if you could smell it you would still catch a sniff of that “brand new” smell.
However, there is something wrong. Little Jimmy is playing the instrument with his left hand (the one that presses down on the strings) with a thumb that rests high on the back of the guitar neck. Everyone should know that poor thumb positioning hinders hand and finger mobility. Perhaps this is a horror story after all.
BAD HABIT #1: Watch that thumb positioning on the left hand. The thumb should be positioned low on the back of the neck in order to maximize finger mobility.
INT — BEDROOM – NIGHT
Little Jimmy surfs the Web for a helpful guitar tab that will show him how to play the song “Scar Tissue” by the Red Hot Chili Peppers.
He loves the song and has always wanted to play. Little did he know, focusing too much on guitar tabs and learning to play sections of your favorite songs will only create a monster.
BAD HABIT #2: While guitar tabs are a very sweet alternative to learning sheet music, too many novice guitarists turn to tabs too quickly. Rather, learn the fundamentals and basics FIRST and then slowly progress to that Lynard Skynard “Free Bird” solo.
EXT – PARK – DAY
Little Jimmy is outside, enjoying the wonderful day with his girlfriend. He has not picked up the guitar in a few days but hey, creativity arrives in stretches. There is always tomorrow, right?
BAD HABIT #3: If you realistically want to become a “guitarist” you must practice every day. No, you do not need to put in several hours but a consistent and regular schedule will ONLY ensure progression. Without it, you’ll never become a skilled musician. Try 15 to 30 minutes a day.
INT – BEDROOM – NIGHT
Little Jimmy’s girlfriend broke up with the future rock star. Now, he has nothing better to do than practice guitar. That, and prove his ex wrong once he finally makes it.
The only problem is his posture is absolutely horrendous. Dismissing any common sense, Little Jimmy wants to play the guitar with the neck facing down (to change the “culture”), ignores the guitar strap, does not sit up straight and refuses to cut his fingernails.
BAD HABBIT #4: Oh, so simple. Correct posture is required for beginner guitarists just as much as it’s required in a business class. The guitar is your business and you must treat it right. Sit up straight, cut your nails, hold the pick right and for God-sakes – point the guitar UP when playing.
EXT – BURGER KING – DAY
Our story has come to an unfortunate conclusion. Little Jimmy tried to learn the guitar with one too many bad habits. Some say that the tragedy of it all is that Little Jimmy could have become an accomplished musician had he spent a little more time here, a little more time there.
Regardless it was out of tune and ended on a sour note. Little Jimmy’s future was destine for a Manager at Burger King.
BAD HABBIT #5: While the simplest of them all; playing the guitar out-of-tune is a train wreck waiting to happen. Music is all about precision and hitting the right note, at the right time. How can you possibly achieve that feat when your guitar is out of tune? Fess up the money for a solid guitar tuner and tune that puppy EVERY time you play. What are you lazy!?
Are the strings on your guitar discolored or rusty? Maybe more importantly, are all six strings present and accounted for? If you answered NO to either of the two questions or if it’s been several months since you put new strings on the guitar, it’s time for a string change.
How often should you change the guitar strings? Just like the brake pads on a car, guitar strings wear out with use. Old guitar strings often behave badly (aka they’ll lose tuning more quickly, sound less “bright”, and give you problems with intonation). Bottom line, if you play the guitar – you need to change the strings every A) couple of months if you play casually and B) every two weeks if you play professionally at gigs, etc.
If you own an acoustic guitar, you need “acoustic guitar strings”. If you own a classical guitar, you need “classical guitar strings” or “nylon strings”. An electric guitar, thus, requires ”electric guitar strings.” If you have yet to get the hint, each guitar requires different strings.
When you go to change the guitar strings, you also must consider the gauge. What is the gauge? It’s basically the thickness of the strings. While every guitarist is different, medium gauge is the recommended level for beginners as you can adjust accordingly upon performance.
Guitar strings, regardless of the gauge and brand, should set you back no more than $8-$16.
Steps Needed to Change the Strings:
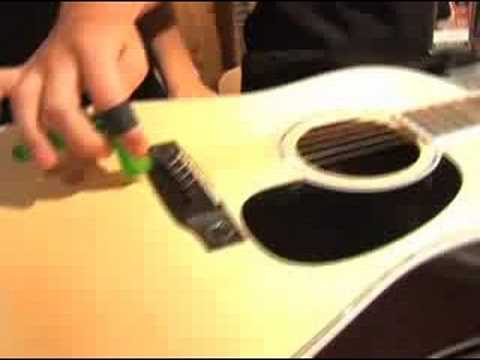
1. Once you’ve completely loosened the 6th string, unwind it from the tuning peg and remove from the guitar. Some individuals find it easier to snip the string in half with pliers and then remove. Make sure you ONLY REMOVE one string at a time. Removing all six strings at once will drastically change the pressure exerted on the neck. The result? Seriously damage to your instrument.
Before moving on, take a few minutes to clean the newly exposed areas of the guitar.
2. Locate the new sixth string (the heaviest of all six) and unravel from the packaging. Feeding the new string through your guitar varies from instrument to instrument. For some electric guitars, you’ll simply feed the string through the tailpiece, in a manner similar to stringing an acoustic guitar. For quite a few other electric guitars, however, the guitarist will feed the new string through the body of the instrument. Flip the guitar over, and locate the appropriate hole to feed the new string through.
3. Flip the instrument over after you’ve successfully fed the string through the body of the guitar. Then, pull the entire length of the string through the bridge.
4. Rotate the tuner for the sixth string, so the hole in the tuning peg forms a right angle to the neck of the instrument. Now, bring the string up the neck of the guitar. Pull the string fairly taught, and using your eye to estimate, measure about one-and-a-half inches past the tuning peg. Crimp the string lightly at that point, so the end of the string points out at a right-angle.
5. Slide the string through the hole in the tuning peg, up to the point where the string is crimped. The end of the string should point outwards, away from the center of the headstock. You may want to crimp the other side of the string emerging from the tuning peg , in order to hold the string in place. Then, turn the tuner in a counter-clockwise direction to wind the new string, using your string winder (if applicable). As it tightens, look down the length of the guitar, and be sure the string is sitting properly on the bridge of the guitar.
6. Slide the string through the hole in the tuning peg, up to the point where the string is crimped. The end of the string should point outwards, away from the center of the headstock. You may want to crimp the other side of the string emerging from the tuning peg (see photo), to better hold the string in place. Begin turning the tuner in a counter-clockwise direction to wind the new string, using your string winder (if you have one). As it tightens, look down the length of the guitar, and be sure the string is sitting properly on the bridge of the guitar.
7. In order to control how the string wraps around the tuning peg, it will help to remove slack in the string. As you continue to slowly wind the new string, take the index finger of your free hand and push down slightly on the string, against the fretboard of the guitar. With the remaining fingers in that hand, grasp the string, and gently pull up and back in the direction of the guitar’s bridge. If you pull too hard, you’ll pull the string out of the tuning peg altogether.
8. Guitarists prefer a different method of wrapping their strings around the tuning peg. Some prefer their first wrap-around to go above the exposed end of the string, and then cross over, with all subsequent coils falling below the string end. Your primary concern should be making sure there are several full coils of string wrapped around each tuning peg.
9. Once you’ve successfully wrapped the string around the tuning peg, bring the string into approximate tune. When completed, take your pliers and snip off the excess string protruding from the tuning peg. Leave approximately 1/4″ of the string, to prevent slippage.*
* – Repeat steps for the next five strings.
Note: Initially, this new string may have trouble staying in tune. You can help correct this problem by stretching out the new string. Grab the string, and pull it approximately one inch away from the surface of the guitar. The pitch of the string will probably have dropped. Re-tune the string, then repeat the process, until the string no longer falls out of tune.
The title of this article may come off as a little strange.
‘I thought that the only way to make the instrument sound good was via someone who could actually play the guitar?’
Correct, but even in the hands of a professional, the guitar will only sound as good as the tune. Thus, you must tune the guitar for quality.
If you have ever observed the professionals, you’ll note that they are constantly tuning their beloved musical instrument. Why? Simply because the guitar gets out of tune often (even modern technology cannot fix this small vice). You’ll want to tune your guitar:
After it’s been bought, regardless of whether it’s new or not.
You’ve been playing with some big bends which may cause the tune to change.
A string breaks.
You travel with a instrument and the temperature changes, the guitar is bumped, etc
In other words, you’ll tune the strings a lot. Fortunately, several guitar tuning methods exist. You may tune the instrument with:
Today’s Fun Fact: Betcha really didn’t think the iPhone could “do it all.”
Regardless of however you tune the guitar, you must always start below the note and then ”tune up” to the note. Why? When you are loosening the string, the nut that keeps the string from loosening when you play may not let go of the string immediately. Thus, after you tune the string may ultimately be ”out of tune.” However, when you tighten the string, the nut has no effect because the string is already under tension.
“The Standard Tune” is tuned to the notes E-A-D-G-B-E. Some guitarists create helpful little reminders like “Eric Archer Digs Great Breakfast Everyday.”
The “first E” (6th string) is at the top of your guitar but is technically the bottom string (because it’s the thickest). “A” is the next string (5th string), followed by ”D” (4th string), “G” (3rd string), “B” (2nd string), and the second “E” (1st string).
If you ask any professional guitarist, most will strongly recommend that you tune the strings in the following order: 3rd string, 4th string, 2nd string, 5th string, 1st string, and finally the 6th string. By tuning in this pattern, the guitarist eliminates stressing and twisting one side of the guitar neck.
While you may use several different methods to tune the instrument, innovative methods like the phone (dial tone is @ the pitch of A), are not nearly effective as say, the electric tuner. While electric tuners are expensive, they are by far the best and most accurate method. For a price of $20-$50, the guitarist may plug the electric guitar directly into the tuner and use the analog or digital device (most professionals prefer the analog needle) to read the note until it reaches the desired position.
The piano is also a very useful for guitar tuning if you are blessed with such a beautiful instrument. On March 31st, Guitar Lessons Critic will break down guitar tuning into a more detailed approach that utilizes such methods as relative tuning and tuning by harmonics. We’ll also examine some of the top guitar tuning devices on the web, such as the one located on Gieson.
Checking to ensure your guitar is in tune is something you should be doing each time you pick up your guitar. After all there are no chords or scales that sound correct when even one string is out of tune.
This brief lesson is going to cover how you can check to see if your guitar is in tune quickly each time you pick it up. We’re going to accomplish this not with an electric tuner but by choosing one particular string on the guitar neck and then tuning the rest of the strings to that string.
Of course there is a chance that none of your strings are in correct tune so even though you may get all your strings in tune with each other if you double check it against an electric tuner you may find all your strings are either higher or lower then they should be.
In order to tune correctly there are only two things you must remember.
The 5th fret is the magic fret
There is one exception on the G string for the 4th fret.
Let’s walk through a quick example. We’ll tune all of our guitar strings to the low E, or 6th string closest to you on the top.
Press the 5th fret on the low E string and play it. This note is an A, which is the same note as the 5th string below it, the A string. By playing the E string on the 5th fret you check to see if the A string below it is in tune. Go back and fourth between the E string on the 5th fret and the open A string below it. Note any pitch differences and adjust the A string either up or down using the tuning peg.
Next move to playing the 5th fret on the A string, this is a D note which matches up to the D string below the A string. As before go back and fourth between the 5th fret of the A string and the open D string. If the D string doesn’t sound like it matches the 5th fret of the A string then adjust its tuning either up or down.
Follow this same pattern for the tuning the G string to the 5th fret of the D string.
Now here is the one exception I mentioned. In order to tune the B string you must use the 4th fret on the G string. Why? Well because it’s the 4th string on the G string that makes a B note. This is the only exception you have to remember when tuning your guitar by ear.
To tune the high E, or first string again use the 5th fret technique explained above.
To get comfortable doing this I suggest each time you pick up your guitar you go through this exercise. It will become second nature pretty quick and you’ll find that in just a few seconds you can double check the tuning on your guitar without having to run for an electric tuner.
Want to progress further with your guitar skills? Why not consider taking some guitar lessons for beginners? You don’t have to sign up for private lessons or find a friend to teach you, there are lots of great online programs from online videos to dvd courses you can use to learn right from the comfort of your own home.