April 8th, 2011

Up close, the guitar has so many components that it might seem like the guitar pick is a rather unnecessary topic of discussion, yet a simple search on Google will yield several results with popular questions like “Do I need to use a guitar pick?”, “What is Hybrid Style Picking?”, “How do you make your own picks?” and more.
As a result, we thought it would only be fair to spend today examining some of those questions as well as providing a few resources (at the end) for additional answers.
Do I really need a guitar pick to play?
While it’s traditional (but not really expected) for individuals to play the guitar with a pick we have certainly heard stories and even know a few people who either learned to play without a pick or to this day still prefer to play without one.
Why?
Some guitarists simply find playing with a pick awkward or not quite as effective as using their fingers. We have heard at least one story of a guy that claimed playing with a pick made the strings sound horrible and extra difficult. However, that’s not always the case. It’s a personal decision, for sure.
If not traditional guitar picks, what?
There are several alternatives but playing with finger picks, hybrid picks or merely your fingers are common answers. More on hybrid picking in a minute.
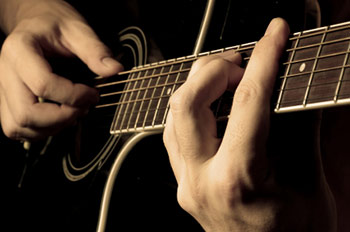
What is the proper way to hold a guitar pick?
Good question.
Holding a pick might look easy but a lot of beginners actually choke the pick too tight and the result is a stiff strumming motion. You should hold the pick firmly (enough, at least that you will not drop it). A good test is to hold the pick between your thumb and finger, then pull it out with the other hand. You should see and feel a little bit of play in the thumb.
When you strum, do not push the pick through the strings. Rather, let your arm fall (pivoting from your elbow) so it drops straight down and quickly across the strings. If you try to force the pick through all the strings the strum will be very uneven. Instead, try and stop the fall of the arm just as it crosses the first string. It will take some practice so do not get frustrated immediately!
Last but not least, it may sound silly, but try to keep your other fingers loose when you pick. Place your pick on the third string and set your other fingers (2, 3 & pinky) on the face of the guitar. Lift away from the guitar and you will have what some call the “perfect pick position”.
NOTE: If your fingers are curled into your palm the hand will stiffen and subsequently cause the grip on the pick to tighten.
What is hybrid style picking?
This is a term you might be hearing a little more these days, but what exactly is it? Hybrid picking replaces the thumb pick and instead you use a flat pick with your thumb and index finger. Consequently, this technique frees up your 2 and 3 fingers (to replace your thumb) or thumb 1, 2 and 3. Some guitarists like this method because it essentially gives you the best of both worlds.
Other guitar pick resources:
SteveClayton.com
V-Picks.com
PickWorld.com
How to use a Guitar Pick
What guitar pick should you use?
Posted in Fingerstyle, Guitar | No Comments »
March 31st, 2011

Congratulations! You’ve just invested in your first guitar!
Perhaps you have been saving for awhile and finally got that expensive Fender that you have always wanted? Or, maybe you’re like the vast majority of most beginners and decided to save a little cash and go with a cheaper priced instrument? Nothing is wrong with the later but you should know that if you pick up the guitar for the very first time and hear an awful buzzing noise it does not necessarily mean you bought a bad guitar.
Rather, it is highly likely that you just need to give the guitar a proper set-up.
Note: Of course, you can avoid this scenario almost entirely by testing out the guitar prior to buying and/or avoiding budget guitars sold at places like Wal-Mart and Target.
The reality is that most guitars require at least some set-up before playing, especially if they intend to use the instrument for one particular style. The first thing you should do with a new guitar is strum the open notes and check for any buzzing or muted sounds. If you do encounter such a sound, a nut is likely bad and will need to be filed down. While it is possible to fix this dilemma, we HIGHLY recommend you hire a professional.
Once the guitar passes the first test it’s time to tune the guitar. First, you must find out if the open note is tuned with a fretted note. In order to do this, test the open and twelfth fret notes of each string. They should sound the same. No dice? It’s time to adjust the intonation. Again, it is highly recommended that you consult a professional although (unlike filing down a nut) you are unlikely to cause any major damage to the instrument.
To adjust the intonation on most electric guitars you will need to tighten or loosen screws on the bridge to move each string’s saddle up or down. However, if you are using an acoustic guitar (or any other guitar with a non-adjustable saddle) you will definitely need to bring in the instrument as there is no way an amateur can fix this properly.
After your guitar passes the first two tests you must check for fret buzz. Fret buzz is when the strings are too low or the truss rod is improperly adjusted, resulting in a terrible buzzing noise.
Once again, the problem is fixable but this time you have a variety of alternatives. Some experts will advise you to try playing with an amp (as sometimes the fret buzz is not picked up) or play softer to hopefully eliminate the buzz. However, your best bet may be to try a heavier gauge string on the instrument. Talk to an expert to see what he or she recommends. Your very last resort is to adjust the truss rod.
Last but not least, a wise guitarist should polish, retune and restring the instrument. Consult your local music shop for a correct polish. Always buff with a dry, soft cloth. When not in use, store your guitar in a temperate, moderately dark and slightly humid area.
Posted in Guitar, Tuning | No Comments »
March 22nd, 2011

Myth
a : a popular belief or tradition that has grown up around something or someone; especially : one embodying the ideals and institutions of a society or segment of society
b : an unfounded or false notion
When it comes to the guitar and the abundance of information that is now available on the Web, it is very easy for beginner guitarists to get caught up in the misconceptions, fabrications and downright myths that are directly related to learning the guitar.
We here at GLC consider this really unfortunate because learning the guitar is going to take some time, determination and patience much less if half the time you are getting the wrong information and/or basing your reasoning on unverified facts.
So…In order to combat guitar myths we strongly recommend that A) you do some research before buying a new guitar B) invest in a high rated guitar course and C) seek further advice from experts/seasoned guitarists in your respective community.
Here are five common but complete myths about the guitar (and its accessories)…
Myth: Acoustic guitars, due to their simple construction and lack of electrical hookup are easier to play when compared to electric guitars
Quite the opposite actually. Electric guitars are easier to play because they have lighter strings, lower action and a smaller neck. This is not to say that it’s impossible to first learn on an acoustic guitar but most experts would recommend electric over acoustic.
This revelation should interest a far share of our readers because we have found that most beginners would prefer to play electric guitar anyhow.
Myth: Expensive guitar strings rust and lose their tone just like cheap guitar strings so why pay the extra price? I can save so much money!
Like anything, you truly get what you pay for. It’s true that even the best guitar strings on the market will eventually lose their tone and need replaced, but high-end strings will last way longer if you maintain the strings regularly. For example, did you know that you can clean your strings after practice with a lint free cloth (i.e. handkerchief) as well as coat the string with a protective chemical such as FingerEase or “Fast Fret”?
Invest in quality strings, apply proper maintenance and your strings will last way longer than you might think. It’s vital that your instrument sounds great and for the guitar it all begins with the strings!
Myth: …But low action and thin strings still play faster!
Again, another common misconception about guitar strings.
In theory, you would assume that lighter strings are faster because of less resistance, right? It’s simply not true. In fact, a lot of legendary classical and jazz guitarists absolutely kill it with either acoustic or nylon strings which are traditionally very thick. Consequently, virtuoso technique is all about correct strength, control, technique, etc and very little about the size of the strings.
We should note that action and size of strings vary largely depending on the guitarist. Consequently, it’s easy to fall into the illusion that thinner strings create more speed but always focus more on accuracy and control if you really want to play faster. On a site note, you should also consider that thinner strings create a weaker tone.
Myth: Large amp equals biggest sound possible, right?
Wrong. In certain circumstances, larger is better but not always the case with guitars and more specifically guitar amps. Actually, some of the most gigantic sounds that have been recorded have been done with smaller 10 to 20 watt amps with the tube jacked up loud. As a result, a lot of bands prefer to put a lot of large amps on stage that are empty of speakers (and really only there for looks) while they tuck a small amp that is mic’d up to the PA system.
A lot of guitar “starter packs” include a practice amp which is a slightly less powerful, smaller amp and like the name implies intended primarily for practice. But just up from the “practice amps” you can find a lot of quality amps for a far less price.
Myth: What about cheap cables? Are they worth the risk?
I imagine you’re starting to see a trend here? Just like cheap strings, amps and guitars can alter the quality of sound output the same is true with cheap cables. Moderate to High priced cables will last longer and the difference in quality is quite noticeable.
How noticeable? A wise guitarist could invest in a phenomenal guitar and amp but with low quality cables the setup will never produce the sound the instrument and amp is capable of producing. Like anything, you can shell out a small amount of cash every six months or spend some more upfront and increase longevity.
Posted in Guitar | 2 Comments »
March 15th, 2011
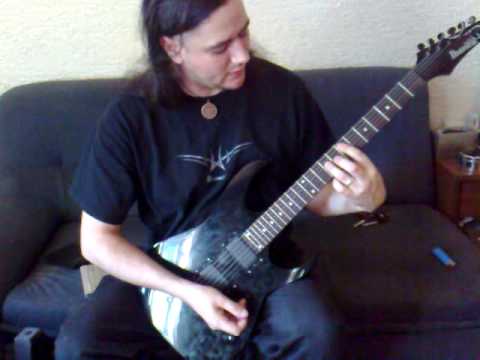
While one can certainly appreciate the electric guitar for a wide variety of reasons, for me, and probably a great deal of other guitarists, the aspect that really separates the electric guitar are the loud, thundering guitar riffs that are often composed from power chords.
You got the power!
Power chords are, without debate, the signature of modern rock, grunge rock, hard rock and metal (NOTE: If you are a true beginner and are not sure what I am talking about, peep the opening riff to Deep Purple “Smoke on the Water” for a classic example).
The interesting thing about power chords is although they are organized into the chords category they are technically not a “chord”. Why? In music and music theory, a chord is three or more different notes that are sounded simultaneously. They are further broken down into “Major” or “Minor” Triads. However, a power chord is an abbreviated version of the full triad chords playing only the root and fifth notes of the scale as a chord. In other words, it’s not technically a “chord” because it only has two notes.
Due to one less note, most beginners would assume that power chords are easier to play. While true in theory, the importance of learning music theory should not be de-emphasized. In order to learn power chords effectively, you will NEED to really understand the names of the notes on the neck of the guitar.
Interesting enough, power chords have a history that dates back to the birth of blues music although the guitar technique was probably not fully realized and used effectively until the 90s grunge era. At that time, most bands relied on power chords almost exclusively, as they were simply easier to play and more appropriate for the genre when compared to “traditional chords”.
Power chords are incredibly versatile in the sense that you can literally move them up and down the guitar neck. This is not possible with regular chords, therefore giving it yet another distinct advantage. Again, this is where your knowledge of the note locations on the guitar neck will really come in handy.
Remember: Each power chord only contains two notes — the root note and another note called the “fifth”. The power chord does NOT contain the note which traditionally tells us whether the chord is major or minor. Consequently, power chords are neither defined as major or minor chords.
Additional notes:
- Guitarists may optionally omit the pinky finger on a power chord to strum the two-note chord we discussed (above). However, some guitarists will still stick with the full, three-note version as it tends to sound more “full”.
- Another common technique for three-note power chords is to play the root note with the first finger and then let the third finger cover the other two notes. As a result, still only two fingers are technically needed.
- Power chords ideally sound best with moderate to maximum distortion, although personal preferences may differ.
Posted in Chords, Genre, Guitar, Heavy Metal, Rock | No Comments »
March 7th, 2011

When it comes to the guitar, scales harmonize the organization of music. What we mean by this is that without guitar scales the instrument would be much more difficult to understand and play, therefore likely not making it near as popular.
As we all know, most Western music divides the musical octave (when one note is twice as high as another) into 12 sections, called semitones. On the guitar, each semitone is represented by a fret. Scales start and stop on the octave, and the most common scales (Major and Minor) consists of seven different notes, other scales may use more or less than seven notes.
Therefore, if you know the pattern of a particular scale you can seemingly move that same pattern anywhere on the fret board to adjust to a particular key.
Several different scales exist (major to minor, blues to pentatonic) but today we wanted to examine five important guitar scales/modes that you may have never heard of before.
1. Dorian
The Dorian scale, or mode, is the second of the seven musical modes. It is similar to the natural minor except for the raised sixth. The Dorian scale is the minor scale that appears when a major scale is started from the second note (second scale-degree). In order for Dorian to be part of the system the notes have to be exactly the same as the parent major scale’s notes (i.e. a major built on the second degree of the parent scale will have its third and seventh degree lowered a half step).
Check out the Dorian positions.
2. Ionian
The major scale, identical to the Ionian mode, is the cornerstone of western music for over five hundred years. As with other diatonic scales, the major scale is made up of seven notes (eight if you include the octave). The Ionian scale, or mode, is the first of the seven musical modes. This major scale is also the parent scale to six other scales known as the “church modes”.
Check out the Ionian positions.
3. Lydian
Lydian is another major mode that is built on the fourth degree of the Ionian mode. The formula is as follows: 1 2 3 #4 5 6 7. Lydian is only one note different than Ionian but the one alteration, the raised fourth degree, makes a huge impact. The Lydian scale is the scale that appears when a major scale is played with the fourth note (fourth scale-degree) as the root.
Check out the Lydian positions.
4. Mixolydian
Mixolydian is the fifth of the seven musical modes. It is similar to the major scale except for the lowered seventh. The Mixolydian scale is the scale that appears when a major scale is played with the fifth note (fifth scale-degree) as the root. Similar to Lydian, Mixolydian’s single alteration adds a whole new spectrum to the guitar’s sound.
Check out the Mixolydian positions.
5. Phrygian
The third of seven musical modes is the Phrygian scale. It is similar to the natural minor except for the lowered second. The Phrygian scale is the minor scale that appears when a major scale is started from the third note (third scale-degree). Phrygian has a borderline dark side with a deceptively catchy feel, too.
Check out the Phrygian positions.
Note: As with all of the scales/modes above, you will notice that the mode is the same as the C major. The difference? There is no difference; it’s the chords that create the magic. Playing a scale over a C major chord will sound exactly like playing a C major scale. However, playing a scale over a D minor chord will sound “Dorian” and so forth.
Posted in Guitar, Scales | 2 Comments »
February 28th, 2011

Why do you want to learn the guitar?
If you were to ask that question most people would say that they want to learn the guitar because they want to master the instrument, write songs, meet band members who share the same passion and take over the world as a famous rockstar!
Becoming a famous musician is still extremely competitive and challenging but thanks to the World Wide Web more options exist for small, independent (or indie) artists. Which means that it is possible to actually get paid for doing the thing you love most — make and play music.
We spend the majority of our time on GLC examining the guitar but today’s post is about surviving as an indie artist. Check out some of needed steps below to make music, promote your name (or band) and actually earn a little money!
It all begins with the Web…
If you have made it this far then we are guessing that you’re a proficient musician with a love of the art that borderlines on insanity. You could make a living being an accountant but you would just as well prefer to play the guitar. If that’s true then that’s the first step because you need an intense desire and passion to make it as an indie musician. Still, for most, you’ll have to work an alternative job to fully support your means.
MySpace is not quite as popular as it was before Facebook became the “network of 500 million friends” but it still remains a viable web site largely because millions of musicians around the world use it as a totally free platform to promote their music. You need to make sure that you, the artist, utilizes Facebook, MySpace, YouTube and even Twitter to advance your music.
Promote your ‘brand’
Your brand is, of course, you the solo musician or the band. Back in the day it used to be that self-promotion meant you were “selling out” but oh how the times have changed. For one, “selling out” back in the day was not the same because those bands were signed to a major record label that invested millions of dollars to do the promoting behind-the-scenes with a skilled team of marketing and promoting staff members as well as PR contacts.
You, the indie artist, do not have the same “team” (your three member street team does not count). In addition to making great music you also have to be the marketing genius behind the sound. As an indie musician you’re not only the artist but also the label executive.
Get Creative
Easy enough, right? You’re an artist after all. The reality is that the Internet is a great tool for indie artists but it’s also a curse because anyone can share their music. So in order for potential fans to surf through all the garbage to finally discover you — the next superstar — you must get creative. Indie artists who make a living solely through music are great stories but they are few and far between. What is your gameplan?
Getting creative as an indie musician means everything from faking your CD (that was recorded in your apartment’s makeshift studio) as something that appears to be from a professional studio, to taking advantage of local college stations, to other unique ways of marketing.
Play live religiously
Never forget the old-fashion, always important aspect of playing live and playing locally often. Sure, it’s not Woodstock but local gigs will secure a foundation with your hometown. It’s grueling, hard work but playing a ton of gigs is the only way you’re going to pay the bills until you can land a record deal (or at least secure enough funds to record in the studio).
Over time playing live religiously should open up additional doors with bigger and better opportunities. In the mean time, appreciate the opportunity and appreciate that these “small” shows are slowly building up your performance skills. Who could possibly entertain 10,000 when they have not even moved a couple hundred first?
It’s got to be digital
Old-school music lovers (such as myself) will testify that nothing compares to buying an actual album, CD, cassette tape, vinyl or whatever was popular during your era. Unfortunately, the times in the music industry have changed and everything is going digital.
This means that you are going to save a lot of money (and earn more fans) by going digital with your music. Instead of full albums the mentality of the music industry (especially with new artists) is “one song at a time”. Singles rule when compared to full albums. Put out a few tracks and build your fanbase from there.
Use the ‘indie’ card
Even on the tightest of budget, an indie artist will need some equipment that is not necessary cheap. Consequently, you have to find a way to address your needs without paying full price. Everyone loves a great underdog story, right?
Indie artists are the underdogs. You will find that a lot of people in your community love to support the local arts and may be surprised to what you can get away with for simply saying — “I’m only an indie musician, how can you help me?”
Posted in Guitar | 1 Comment »
February 21st, 2011

The term networking is tossed around a lot professionally because it is considered a basic principle for expanding your name, business, or career but networking can also extend to virtually anything.
We here at Guitar Lessons Critic consider this an important fundamental to learning the guitar because often beginners are learning alone and need to connect with other guitarists once and awhile to stay motivated, inspired and educated.
If you’re learning from a private instructor, awesome! If you have a good buddy who also plays, even better. But if you’re like a growing proportion of aspiring guitarists that are self-taught and learning from a guitar course you probably do not know anyone on a personal level who plays. Today, we plan to change that by suggesting 5 easy places to network.
Want Ads/Local Bulletin Boards
A great deal of outreach and networking has relocated to the World Wide Web but that does not mean you cannot find out about local music groups, clubs, etc the old-fashion way. For example, a basic scan of the community bulletin board in my hometown revealed that a local non-profit hosts a FREE open-mic/jam night at their center every Thursday night.
Also, if you enjoy the nightlife you’ll likely find a lot of local bands that play on Friday and Saturday nights at the nearest bar or club. Feel free to mingle with the band after their show and express your interest in regards to learning the guitar and connecting with the local music scene.
Music Store
Almost every town, small and big, have at least one locally owned music joint. So if an individual was to advertise, say a weekly gathering for guitarists or musicians in general, we’re pretty sure that he would post the notice at the music store.
If nothing else, the people who work at these shops love music. It’s probably their life. You can probably learn a great deal from them and hopefully network further. Just remember to give them a little business here and there.
Social Networking
Ah, the grand invention of the 21st century. Social networking sites like Facebook and Twitter are absolute hot spots for guitarists to network. For example, a simple search of #guitar or #learn guitar may lead to thousands of results on Twitter or searching for groups or fan pages on Facebook should bring up more than a few guitar pages designed solely for networking.
Here, you can meet people who share your same passion, ask questions, answer questions, collaborate, etc, etc. The sky is basically the limit here and best of all access to these pages are absolutely FREE. You just need to “Like” the page and check back often.
Chat/Forums
A lot of the larger guitar sites offer their own forums for members to ask questions or seek advice from people who may know a little more about the guitar than you. Again, almost all of these resources are available at no extra cost and can be a phenomenal place for networking.
WARNING: Always use discretion when listening to advice and answers to your own questions. Just because someone posts on the Internet and claims to be an “expert” does not mean that said individual actually has any experience or stance on the matter. It always helps to do a little extra research.
Guitar Courses
Highly rated guitar courses like JamPlay actually include a website where users can go and network in addition to the lessons. We strongly recommend these types of courses because A) they are reputable, legitimate ways to learn the guitar, B) provide a lot of extra resources and ways to answer your questions as well as C) perfect for networking.
Posted in Guitar | 1 Comment »
February 13th, 2011

If you are a regular on GLC you will probably agree that most of the content on this blog deals with the actual guitar whether it be the instrument or ways to improve how it sounds when you play.
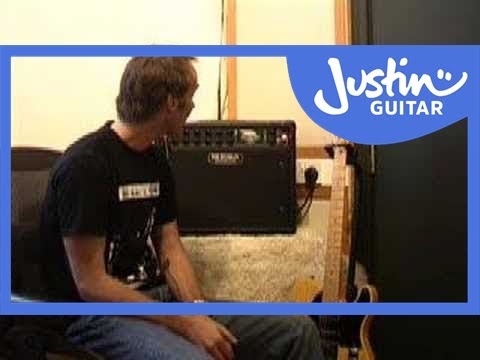
Admittedly, we probably do not spend enough time dealing with something that is NOT on the actual guitar but is very important to electric guitarists. As a result, today we’ll spend time examining the electric guitar amp, examining what all those little knobs do, if for example, you just bought a new guitar package this past week.
Electric Guitar Amp Settings 101
First off, let’s start with the definition of a guitar amp and what it actually does. The guitar amplifier (or ‘amp’ for short) is an electronic amplifier designed to make the signal of an electric or acoustic guitar louder so that it will produce sound through a loudspeaker. Beyond its basic mean of producing “louder” sounds amps can also modify an instrument’s tone by emphasizing or de-emphasizing certain frequencies and/or adding electronic effects.
Now that we have all the “big terms” out of the picture, the reason guitarists utilize amps is because the range of tone available is just so much greater. The guitar amp completely revolutionized rock ‘n roll because it brought a whole new spectrum to sound that musicians never thought possible.
When you first brought home your guitar amp you probably noticed that various knobs like “Treble”, “Middle”, “Bass” and “EQ” are situated on the front. You may have a basic understanding of what these settings do but if not, let’s define each term:
Treble – soprano; having or denoting a high range. Adjusting this setting will determine the amount of high end in your sound. Lots of treble equals a very sharp and crisp sound.
Middle — between the soprano and the bass, your middle control will impact the overall character of your sound. You could say that this is the most important setting. Little middle and you get that classic rock ‘n roll sound while higher mids equal a more blues like quality.
Bass — the low range is beloved by a lot of musicians and fans alike because it has that infamous deep, thundering quality. Most guitarists unanimously love a lot of bass but of course it always depends on personal opinion.
NOTE: You may not get the full effect of the bass with smaller amps simply because they are just not equipped to handle the load.
EQ/Tone — this is your “overall” control. While Treble, Middle and Bass will ONLY adjust that particular range the EQ/Tone manages all your basic settings with one easy knob.
Additional Guitar Amp Settings
Every dependable amp should include the above settings but a lot of amps will also feature controls for distortion, chorus, reverb, etc, etc. If you have a solid understanding of Treble and Bass then distortion and reverb are just an added bonus. These types of controls are solely for guitar effects, allowing you to squeeze that sound exactly like how you intended.
Feel free to play around with those settings but always master the basic guitar amp fundamentals before getting too far ahead. As is the case with anything, cheaper amps will probably have less settings and not sound as good (especially when played loud).
If you bought a guitar package (guitar, amp, strap, picks, etc) you likely ended up with a practice amp. These small amps are great, like the name implies, for practice but do not sound exceptionally well when the volume is above a normal level. It’s a great starter tool but overtime most guitarists will eventually upgrade.
Experiment with your Guitar Amp
Have you ever watched an elderly individual attempt to use a computer for the first or second time? If so, you will probably observe that they are very timid and constantly afraid that one wrong click will “break” the entire computer. Of course, anyone who has used a computer knows this is silly but basically it comes down to that age group not being very familiar with the product and thus scared to use it.
The same could be said about guitar amps. At first, you may not want to mess with the amp settings too much because it could do harm to the machine or others might wonder what in the hell you are doing. In reality, nothing could be further from the truth. The only way you will really know what your amp is capable of doing is by experimenting with its settings. Play with the controls and have fun!
As a general rule of thumb, always starts with ALL dials pointed at 12 o’clock and work from there. Take notes if you find such a practice useful. Over time, you will learn which settings you like best and for what situation. Then, it really becomes fun because you do not have to do as much thinking and rather focus on the creativity of producing new music.
Posted in Guitar, Tuning | 1 Comment »
February 7th, 2011

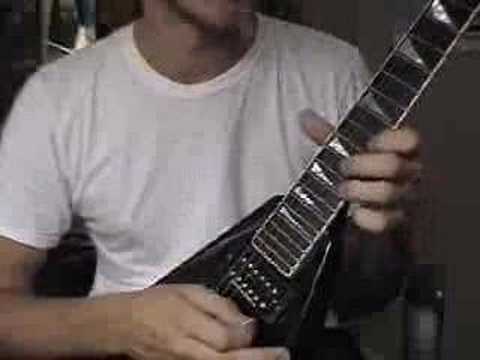
If you have never heard the term sweep picking before then you’re more than likely a beginner guitarist. Today’s lesson is designed for the more advanced player although the guide is also set up as an informative piece to educate those who have never heard the term before.
Sweep picking is considered by most to be a technique that separates the average guitarist from the advanced guitarist. In general, advanced guitarists will use sweep picking to play arpeggios. Traditionally, distortion is needed to master sweep picking although it has been used before with a “clean guitar”. However, when guitarists utilize distortion with sweep picking they will find that arpeggios are generally challenging to master.
Guitarists love sweep picking because it essentially allows individuals to control what notes are ringing throughout the arpeggio. Typically, only one note sounds while the other notes are completely muted. The guitarist can accomplish this feat by either using the palm of their hand to mute the strings they are not playing OR use the thumb of the picking hand to do the same thing.
Mastering the muting technique will take some time. Of the above two methods, neither is the preferred approach. If you want, try muting the strings each way and attempt to decide which one feels more natural. The goal is to listen to how clean the arpeggio sounds when you mute the other strings.
When guitarists sweep pick each note should have definition and rhythmic placement. Someone who is unfamiliar with this technique will simply strum the pick across the strings and the sound will be very sloppy and out of time. Remember, make sure each note has definition.
As you practice sweep picking you will more than likely run into some other common problems. Guitarists who are familiar with “finger rolling” may complain about certain issues while others will remark about the pull off at the top of each arpeggio lacking the same dynamic tone as the other notes.
If you run into a lot of issues, Ultimate-Guitar has a really sweet guide dedicated to seven major (and common issues) with sweep picking. Keep in mind the general rule of “slower is better” when first learning and it will not be long before you too are mastering sweep picking!
Posted in Guitar | No Comments »
January 31st, 2011

Surf various guitar websites and/or frequent message boards and you will find a big fat myth related to the acoustic guitar. The Web (for all its wonders) has a lot of misleading information and downright lies, but because anyone can purchase a domain and post some content, they are mistaken as creditable resources.
The big myth that I am talking about today is acoustic guitars and how a lot of people seem to be under the assumption that it’s a completely different instrument when compared to the electric guitar. In reality, the tone is much different (obviously), but that’s about it!
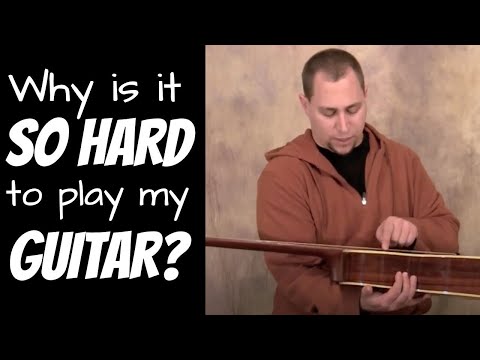
If you actually believe that there are certain things you can play on electric but not acoustic, you are wrong. Truthfully, the acoustic and electric guitar are very much the same and just about anything you can do on electric you can also play on acoustic. In the end, the primary roadblock that prevents most from accomplishing (and therefore thinking) that the two are different instruments is because the acoustic guitar is not properly setup.
Make sense?
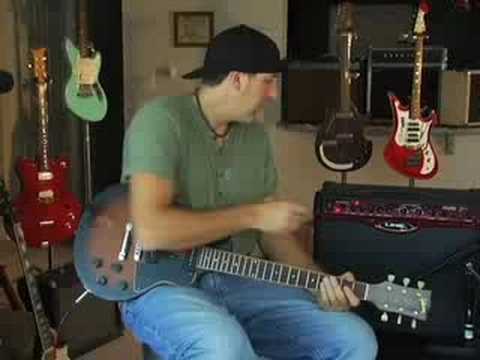
GuitarSetupGuide.com has some wonderful resources on the proper setup of an acoustic guitar. Common acoustic troubleshooting like how to play bar chords, scales, riffs and soloing are all addressed in detail. Here, for example, is one of their videos on dealing with a common issue — the location of the action.
If you have never played a guitar before and are currently stuck between electric or acoustic, I should note that while some may say it is harder to learn on acoustic that is not necessary true. With the right setup (as introduced above), beginners can learn just as well on acoustic guitar as electric.
In fact, the grand battle between electric and acoustic comes down to your own personal style and budget limits. Yes, acoustic guitars have larger bodies and necks. Some individuals will also note that they have an easier time pressing down on electric guitar strings when compared to acoustic.
In the end, the size of your budget may make the final decision. If so, you’ll likely settle with acoustic guitar since they are generally slightly cheaper. While it’s never good to just opt for the cheapest route, if you really do want to learn to play an acoustic guitar there are a variety of outstanding resources available. Always heed to proper guitar setup and you should be good to go!
Shopping for an acoustic guitar? Check out the Top 10 Beginner Acoustic Guitars.
Posted in Guitar, Videos | No Comments »
|