July 15th, 2010
“Many will enter, few will survive.”
The above quote may be more appropriate for a gladiator movie, yet it’s also in a strange way fitting of the process in which you attempt to learn to play the guitar.
Think about it. The guitar is not too physically demanding but what it lacks in real, tangible stress it makes up for in mental frustration. Learning a musical instrument is not easy and by now I’m sure you have heard that a thousand different times.
That’s not the point of this post. The point of this post is to examine the many ways in which it is possible to learn to play the guitar without the aide of an instructor.
Personal instructors are time consuming, demanding, and more than anything expensive. And I’m here to tell you that you don’t need them. In fact, I’m here to tell you that you can do better (gasp) on your own. I’m here to tell you that learning the guitar has never been so easy to pick-up as it is in the 21st century.
So, where do you begin? Self-taught guitarists would tell you that it is definitely possible to self teach guitar based on their experience. These people are also highly dedicated, organized, and determined to their craft – playing the electric or acoustic guitar.
However, not everyone is as dedicated, organized, and determined as those same individuals. In fact, most struggle to remain self-motivated, especially when they are picking up the guitar at an older age when school, work, family, etc seem to always take precedence.
Consequently, in theory, it’s not that hard to learn the guitar but it is hard to stay committed. If you’re a real human like the rest of us, chances are that getting an education or making a living is going to have to take priority over being a rockstar…for now anyways.
- Dedication, Organization, Determination -
Get it, Got it? Good.
If you really think that the guitar is self-taught than you must possess all three traits. Then, you need to look into the three most important, yet overlooked tips.
1. Structure Your Lessons
The most common mistake is to pick up short tutorials from various sources such as guitar books, websites, or magazines and fail to structure everything together. The problem with studying various and seemingly unconnected tutorials is that they share no relation, so beginners are unable to make sense of the standard guitar concepts.
The result is the revelation that you’re not progressing but merely picking up a variety of otherwise useful lessons scattered in an inconceivable order. Hence, the individual losses passion for the instrument, failing to develop a strong foundation in proper techniques needed to progress.
Structured guitar lessons should progress in challenge and complexity. You should start with the sheer basics, such as posture, hand position, holding of the pick, tuning, etc. Slowly you should evolve into basic chords, scales, rhythm, and strumming patterns. The lessons are sequential.
Get it, Got It? Good.
2. Learning Plan
Now that you have structured lessons, the guitarist must institute a lesson plan. When will you play and for how long? This should be a strict time each day that is consistent. It’s not good enough to just assume you’ll practice when you “have a minute.” Daily practice is necessary, so you cannot merely think it’s a once or twice a week type of activity.
3. Self-Discipline
A wise man once asked, “I have the foundation and the tools, what else do I really need?” Exactly. The structured lessons will serve as your foundation while the lesson plans will work as your material and tools. With this solid foundation, material, and tools, the guitarist truly does not have a reasonable excuse for failing.
Remember, it all goes back to dedication, organization, and determination. Everything is outlined for you, now it’s time to put your intentions into action.
Now, laying out the three basic (but often) overlooked tips may seem easy enough, but if you are a logical person you can probably cite something that is even wrong with this plan.
Knowledge.
The bottom line is that you can be the most stubborn, organized, and driven aspiring guitarist of all-time, but if you lack the knowledge of the instrument you are destine to fail. That is where personal instructors came in for decades and where the Web is slowly replacing them. Someone or something must be your source for reference because after all, if you already had all the information, knowledge, insights, and wisdom on the guitar, you probably wouldn’t be classified as a “beginner” now would you?
Here is where online, self-taught guitar lessons come into the equation. They are one part personal instructor (often taught by expert in the industry who lives far, far from you) and another part self-driven. So you are essentially learning to play the guitar alone, but with the advice, tips, and lesson plans from one of the greatest guitarists in the world.
Not bad when you think about it.
In fact, GLC has dedicated its entire online existence into providing you with the very best online guitar courses in the world. Suddenly, $19.95 for JamPlay or even $149 for Learn & Master Guitar doesn’t sound so bad.
Click Here! For our full, detailed reviews on the top four programs.
Here is my challenge. I dare you to skip the costly needs of a personal instructor and to otherwise use that monetary investment on an online guitar course. Often you can download or order these programs via mail, go through the lessons at your pace, and learn as much if not more from these highly skilled and knowledgeable teachers.
Playing the guitar without an instructor…it’s as simple as that.
Posted in Courses, Guitar, Learn Guitar Online | No Comments »
July 7th, 2010
The majority of artists throughly believe that their own instrument is an essential element of the music experience. The “one size fits all” mentality does not exist in the musical world. We’ll leave that to baseball caps.
Rather, the musical instrument you play is completely central to you – the artist. Aside from the artist’s need to have a guitar that feels suitable within their hands, the instrument must also communicate the correct mindset of one’s music. The challenge, thus becomes for the musician to transform what appears to be a guitar, like any other guitar, into one that complements the distinctive style and reflective tone of the artist.
Keep in mind that the ideology of a “customizable guitar neck” is more appropriate for the moderate to advanced player. Most standard guitar necks are adequate for the typical guitarist. However, when those same guitarists begin to advance either in interest or skill, some desire for a more custom-made piece.
Enter [customized guitar necks]
Customizing the guitar neck is popular among guitarists largely due to the fact that it’s rather easy to accomplish and several different varieties exist.
Among the most popular and easiest is to merely switch out a neck plate. The World Wide Web is filled with a nearly endless supply of neck plates, which when combined with your local music shop, is likely to have something for you. Yet if the abundance of guitar plates available on the Internet is still not enough, a few will opt to completely customize their plate from a specialty store.
Guitar:
How To Replace A Guitar Neck Plate
Note: A few guitarists, especially those with famous vintage guitars, are frequently blessed with an already distinctive and recognizable guitar neck plate.
If you really have an artistic side, some will take the customizable approach a step further by manually painting the guitar neck. This is a very rewarding experience, especially if you do the procedure right. Should you be experienced, prepared, and confident enough to carry out this task, consult the proper ways to paint the guitar neck. In any event, the musician must be certain that the proper kind of finish is utilized on the guitar, in order to preserve the correct tone.
Making Neck Adjustments on an Electric Guitar — powered by eHow.com
If you still do not feel comfortable with the whole “I’ll just paint it myself concept,” several guitar shops will be willing to carry out your “dream project.” Stop by your local music shop when you get a chance and ask about what they will do for “custom guitar neck creations.”
You will find that most, if not all guitar shops, will offer some type of guitar customization and should have plenty of terrific ideas for the guitar neck specifically. Provide them with the exact theme or details you want. Maybe you’re favorite band is The Rolling Stones and the shop could find a way to incorporate their famous tongue logo onto the neck?
The options are literally endless.
So if you have a birthday (or even Christmas) coming up soon, why not splurge a little and treat yourself to a brand new look? The beauty of guitars, perhaps more than any other instrument, is the numerous ways they are designed, constructed, painted, and even bruised through the years of playing.
It’s true, no two guitars are exactly alike.
Posted in Guitar, Videos | No Comments »
June 28th, 2010
Welcome to the complex, confusing, and difficult world that most beginner guitarist affectionately refer to as guitar intervals.
It should be noted that learning the intervals alone can be quite difficult for guitar players, especially if you are just beginning to learn the various names such as major second and perfect fourth. Match this alongside the trouble many beginners have in remembering that guitar sounds one octave lower than written, and you have a subject that most desire to ignore or skip altogether.
According to Mike Hayes, a guitar coach, the numerous years of teaching experience has led him to one simple conclusion in regards to intervals – they’re easy to understand when presented in a particular sequence that the individuals can successfully recall the sound.
The first interval you need to learn is the major third followed by the minor third. Once, you are able to accomplish those feats, the “perfect fifth” is your next grand battle.
The perfect fifth interval is a very common interval and when the two notes of the perfect fifth interval are played simultaneously, they produce what is technically called the “harmonic fifth.” In rock terms, the harmonic fifth is more commonly known as the ”power chord.”
Interesting enough, most guitarists have been playing the harmonic fifth for quite some time, although they do not refer to it by it’s technical title. Similarly, they say most writers understand grammar, yet are unable to dissect the piece and individually label each word by it’s grammatical term.
The same is true of the guitar and it’s relationship to intervals.
Harmonic Fifth
If you would like to hear a phenomenal example of the harmonic fifth, listen to the opening chords of Dire Straits – “Money For Nothing”
——-
——-
–7—-
–5—-
——-
——-

Now that you have an understanding of what the perfect fifth is suppose to sound like, do your best to attempt to hear the interval when played as single notes. Begin by playing the equivalent of middle “C” (piano) on the guitar fretboard. Middle ”C”s reference pitch is the third string; fifth fret.
——-
——-
–5—-
——-
——-
——-
Now play the note “G” (second string; fret eight).
——-
–8—-
——-
——-
——-
——-
Listen closely to the sound of the two notes. That, my friend, is the interval of a perfect fifth when its ascending.
Play the two notes again, this time listening carefully for the “space” between the first note (middle C) and the G. That’s the sound you need to be able to recall.
Now, play the two notes as a chord…
Harmonic Fifth
——-
–8—-
–5—-
——-
——-
——-
Note that this harmonic fifth is different from the one presented earlier in the song, “Money For Nothing.” While it may sound different, the Dire Straits song and the chord you just played are from the same interval only in a different key.
In order to hear, recognize, and most importantly recall the sound of the perfect fifth interval, GLC further recommends these songs for the ascending perfect fifth:
1. Twinkle, Twinkle Little Star
2. One (Metallica)
3. Star Wars
4. Scarborough Fair
5. Can’t Help Falling In Love (Elvis Presley)
The five songs listed above are just a few of the many that begin with this interval.
In theory, a guitarist that constantly “looks” for the perfect fifth interval will eventually master the technique in his or her own work.
In other words, we just gave you an excuse to listen to music. Now go!
Posted in Courses, Guitar | No Comments »
June 16th, 2010
Guitar scales in blues music are one of the most important factors to consider when playing blues guitar. If you fail to learn the fundamentals behind these vital gems, you will consequently fail to gain a real understanding of the notes you’re playing or how to eventually create your own sound.
Today’s lesson?
Discover the two essential blues scale patterns – pentatonic scale and blues scale:
Pentatonic Scale in E
E: Open & Three, A: Open & Two, D: Open & Two, G: Open & Two, B: Open & Three, E: Open & Three
Blues Scale in E
E: Open & Three, A: Open, One & Two, D: Open & Two, G: Open, Two & Three, B: Open & Three, E: Open & Three
(letters represent the strings and the numbers represent the frets)
If you studied the above diagram, you’ll easily note that the blues scale is more or less the same as the pentatonic. The only difference is the extra note, in this case, the Bb. This note plays an important function in blues guitar as it’s often referred to simply as “the blue note.”
The blue note is what gives the blues it’s unique style and sound. GLC could attempt to describe what this sound does to your music, but don’t you think it would be a lot more practical just to try it yourself?

The best way to play with the pentatonic and blues scales are with a backing track. It’s important to hear how the scales sound within the context of a song. See if you can locate something with a particular “blues feel” or merely build your own with such handy devices as the looper pedal.
Once you have the backing track, try to shred some licks. What exactly is a lick? Guitar licks are essentially phrases written using these scale shapes. Hence, they’re perfect for incorporating the scales interactively into the sound rather than just settling with a simple collection of notes.
The world of improvisation (a trademark of the blues) is sure to open a broad understanding of the different blues scales and how they blend into the musical process. Thus, you must possess these basic skills in order to become a successful guitarist who can improvise and create brilliant riffs.
1. You should be able to visualize the scale on the fret board and play them instantly.
2. Your fingers should be able to instantly play each note of the scale on the entire fret board.
3. You must also know how many notes are there in the scale, what are their degrees and where you can exactly use a particular scale.
4. The last but not the least and the most important thing is to reproduce the scale in a musical way without the monotony of just playing the notes of the scales on the fret board.
If you fail to meet any of the four vitals above, than it’s a clear indication that your knowledge of guitar scales is less than 50 percent. Unfortunately, this will really affect your improvisation skills.
Fret not (no pun intended). The people who possess all of the above are in the minority and that is the minority group of “guitar masters.” It will take a lot of determination, hard work, and patience to become an expert.
Patience, it would seem, is the key to everything.
Posted in Guitar, Scales | 1 Comment »
June 12th, 2010
Before you pick up the guitar for the first time you should know a few simple yet very important basics (or rules if you will) to the guitar. Like any new hobby, the individual improves over consistent and effective practice. If you pick up bad habits early on they’ll be very hard to break later.
Key point: Learn the right way from the beginning.
Aches and Pains
Your fingers will hurt for awhile. This is inevitable. One of the biggest complaints new guitarists gripe about is pain in the fingers. The truth of the matter is that you’re using new muscles in a different way and they’re going to get sore. Think about the first time you went snowboarding or ice skating. Were you really sore the next day? Same thing goes for learning the guitar. Thankfully it will not last after a good month of playing.
Accuracy is better than Speed
If you’re into the guitar because you want to learn it fast, than you are in it for all the wrongs reasons. Likewise, just because you play fast does not mean that you are in fact a good guitarist. Take time with each lesson (even the most mundane) and follow the instructions slowly in order to ensure that you do not pick up bad habits.
Technique is Important
At times you will come across a technique and might even feel that it’s easier to do this your own way. This is especially true with chords, as sometimes the fingers and positions listed do not appear to make a lot of sense….YET. Keep in mind that many techniques have you position your hands and fingers a certain way because later on this hand and finger is important for transitioning quickly to say, another chord.
Practice is NOT a Chore
The moment it becomes one, the second you should drop playing. Keep in mind that you got into the guitar because it looked like something entertaining to do. Push yourself in practice but always keep it lively.
You Can’t Do it Alone
There are several hobbies that you can learn on your own. The guitar, is not one of those. The cold hard truth is that you need help. Thankfully, the internet is very fertile when it comes to guitar lessons, instructional videos, and other material designed to improve your skills. Not only that, but they are more affordable than ever before.
Click Here! For our outstanding review of some of the greatest online guitar courses on the Web.
Now, to guitar music theory…
Guitar music theory is something you may have heard about before. It’s the idea of applying musical theory to the guitar in order to recognize patterns or styles of music. Understanding this theory will enable you to play any style of music because you will see that music can be broken down into parts. It’s the science of music.
Music theory applies to the guitar through scales, steps, chords, and chord progressions. Each of these aspects contribute to the overall song. If you learn these, than you will learn all of the components of the science of the song.
One online guitar expert likes to compare guitar music theory to a recipe. For example, if I was to say that I’m making supper and I needed the following: tortilla, rice, beans, chicken, salsa, and cheese - you would assume that I’m making a delicious burrito. Which is true.
Furthermore, the scales, steps, chords, and chord progressions are the key ingredients of a great song. The better each of these ingredients are, the more well defined and unique the taste.
To make a song you need to incorporate different terms like: a major scale, a chord progression, and rhythm. A scale is typically a major or minor scale. It represents the relationship that notes have to each other.
The C Major Scale, for example, is defined as: C-D-E-F-G-A-B-C.
A G Major Scale is defined as: G A B C D E F# G.
Each of these feature what is known as a step sequence. The step sequence utilizes such terms as “whole” or “half steps”.
The C Major for example: C whole step, D whole step, E half step, F whole step, G whole step, A whole step, B half step C.
After you understand the scales and steps, you must progress to the chords. A chord is like a scale as you typically only hear two types - major and minor chords.
A C Major chords looks like this: (C E G), the intervals that define this are: C 2 steps E 1.5 steps G. A major chord is defined as: 2 steps – second note – 1.5 steps – third note and a minor chord is defined as: 1.5 steps – second note – 2 steps – third note.
Time to progress to the progressions – the chord progressions that is. If you can start to add these variations in to the progression: ACE, DFA, CEG, FAC, GBD, EGB, and BEG you will have ultimately achieved a song. You may of course alternate what chords you want to play.
Learn these simple terms and you have in fact unlocked the foundation to the song. If you do the dirty work now, the basics, theory, and terminology of the guitar will ultimately improve your overall intelligence and appreciation for the guitar.
Posted in Chords, Guitar, Scales | 1 Comment »
June 3rd, 2010
One very versatile and effective music product that has been lost in the massive wave of modern technology is the looper pedal. What exactly is a looper pedal? A looper pedal is a special little toy that will enable any guitarist the ability to produce loops from scratch.
If you want to be an excellent guitarist, practicing with a looper pedal is essential. Why? Few pastimes are as enjoyable as creating an entire song by yours truly. Musical creativity is endless when you have the chance to layer the chord progressions, bass lines, rhythms, and drum beats with one individual and with a single instrument.
Did you know? Loop-based music was initially made popular by Robert Fripp, the musician who benefited from a stream of experiments involving tape loops.
What is great about looper pedals is A) how easy they are to use and B) their afford-ability. Looper pedals range from $160-$600 depending on the number of tracks recordable and other features. As a guitarist, you may have different aspirations for the loop pedal than that of a singer. Think about what you want to get out of a looper pedal and research accordingly.
Too often it’s easy to get suckered into the most expensive product with a million different features (a quarter of which you’ll probably use regularly). For example, if you are just looking for a pedal that will allow you to layer three or four different guitar tracks, than a $200-$250 looper pedal should do just fine.
Most looper pedals have similar functionality. One pedal is commonly reserved for recording, playing, and overdubbing. On the first tap, it records you playing, the second tap stops the recording and starts the looping, and a third tap allows you to overdub.
Guitarists may then build up their backing track with whatever other instruments they seem fit. Most loopers will also allow you to undo your last recording and it’s highly recommended that you invest in a looper with this capability. Secondly, look into pedals that allow the user to switch between different loops, reverse loops, play along to a drum track, as well as change the tempo of the recordings on the spot.
Over time, guitarists can build up their own backing track by adding to the existing loop. In loop terminology, this is known as overdubbing. Looping is fantastic for practice and jamming out at home, however you can also gig alone with one if you desire.
Did you know? Fripp’s experiment with loops was successful enough that the musician ended up on a tour appropriately titled the Frippertronics Tour? It was here where Fripp brought delay and looping effects a step further into the mainstream.
Looping is a very cheap, simple, and effective way to record music. If you really want to get serious about your music, you’ll one day need to invest in higher quality recording and engineering devices. In the meantime, however, you may surely learn a lot from a looper pedal.
Ask most guitarists and they will tell you that having a backing track or variety of backing tracks is a great way to practice once you have moved past the basic lessons. Not everyone has the ability to call up three or four friends and meet for a quick jam session. People are busy and always working. Thus, you will have a lot of time where you’re only able to practice alone. Enter the pedal.
Once you purchase a looper pedal, try to make four or five different backing tracks. They do not have to be complex, but rather something that you can vibe well with and is easy to strum along to. Try to record a few different styles or genres, and mix up the tempo for further skill.
Click Here! For an excellent review of the five best looper pedals from 2010.
Posted in Genre, Guitar | 1 Comment »
May 26th, 2010
It’s true. The buyer’s market is shifting to the World Wide Web. People cannot get enough of shopping and buying products online. The availability and ease of comfort (shopping from one’s home) are clearly two of the strongest selling points for online retailers.
Which brings us to a question we often receive on Guitar Lessons Critic. “Should I buy my new guitar online?”
Purchase Guitars Online: Overview
First, let’s study the benefits of buying the guitar online:
- Wide selection
- Shop from the Convenience of your Home
- Cheaper Prices and Terrific Sales
- Shipped to Your Front Door
Based on the selection, afford-ability, and comfort of online shopping – many beginner guitarists opt to go this route. However, they may miss out on a few opportunities that one would receive if they were to buy the guitar from a local retailer. For example, shopping at an actual retailer provides the following benefits:
- Chance to actually “feel” and “see” the Guitar before Purchasing
- Conversing with a Store Representative who is likely an Expert with Guitars
- Taking home the Guitar the same day you Bought it
- DO NOT have to pay with Credit Card and hand over Personal Information
- Generally offer better Return Policies and Warranties
Purchase Guitars Online: Questions to Ask
Now that you know the pros and cons of purchasing a guitar online you must make a decision. Will you buy from a local retailer or opt to go online? If you still are sold on the Internet, than you must ask yourself the following:
- Is the retailer reputable?
- What is the company’s history? How long have they been in business, what is their feedback rating, where are their headquarters?
- Do you know anyone who has shopped there previously? Were they satisfied with the product? The service?
- What type of payment options do they offer? Anyone who does not utilize PayPal is sketchy at best.
- What is their return policy like? How long is the warranty good for?
- Are they easy to contact? Do they offer a resolution center with 24/7 chat and a valid 1-800 line?
Always try and purchase products from trustworthy online retailers like eBay, Amazon, etc. This is even more important when you desire to buy something used, but it is still not “bulletproof” as scams occur on eBay too.
Purchase Guitars Online: Buyer Feedback
The buyer feedback is quite possibly the most valuable tool online shoppers can use. Feedback on sites like eBay allow users the opportunity to discover a little about the seller’s history. Most general feedback systems display the number of times feedback was left and then a percentage of that feedback is calculated as positive/negative. eBay takes it a step further with the “Power Seller” label.
If you plan to purchase a guitar from a site like eBay, Amazon, etc you should only do business with buyers that have a 95% or higher approval rate with a minimum of 10 reviews (20-30 on the very conservative side). “Power Sellers” do this for a living and have likely sold hundreds if not thousands of products online.
If you plan to buy a guitar from an actual retailer or distributor, do business with companies that search high on Google, Yahoo, etc and have a detailed background with high quality customer service and return policies. Keep in mind that it’s real easy to create a “professional” looking web page, so do your research prior to making any purchase.
Purchase Guitars Online: PayPal
PayPal appears to be the “go-to” escrow system for online transactions and for good reason. The site is very reliable, protecting both your identity and funds. Never just blindly send a check in the mail, hoping that this company will someday return with a new guitar. Make sure that the buyer is verified with the Veri-Sign Secured button at the bottom of the home page. Keep in mind that anyone can copy and paste, so you need to click on the button to ensure it’s accuracy.
For example, when clicking on the Veri-Sign button on the home page of a guitar retailer like GuitarCenter.com, one is transfered to this page.
Purchase Guitars Online: Recommended Retailers
Below is a list of a few music suppliers that we would recommend for your new guitar. Please keep in mind that their are several other reputable companies not listed below.
Guitar Center
Musician’s Friend
Music123
Guitar Trader Online
zZounds
Purchase Guitars Online: Conclusion
Please consider the article as a warning rather than an attempt to steer you away from online shopping. By listing everything that could go wrong or you need to look out for, we hope that this will successfully provide you with a pleasurable experience.
Your guitar is meant to be enjoyed and once you do own one, be sure to check out some of our top rated online guitar courses. These courses will truly take you to the next level and allow your dreams to become a reality.
Posted in Guitar, Learn Guitar Online | No Comments »
May 19th, 2010
The past decade has presented numerous technological advances to the music industry. From the equipment used to record music to the vary devices that we replay the music with – music technology is advancing more to the common man. It’s growing, changing, and evolving for the best.
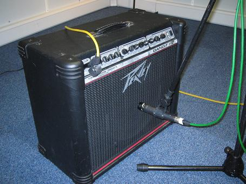
For example, in the past, a great guitar sound was reliant on owning a deluxe guitar amp, a quality microphone, and a decent studio or room. These days, with a simulation unit such as a Line6 pod, and a PC, musicians may digitally record a convincing guitar from their very own bedroom.
This proven, but highly undiscovered technique is a hidden gem in the guitar world. Guitarists no longer need an expensive amp to, no pun intended, create a rich sound. You also do not have to own/rent a studio to be able to crank that amp to the kind of volume needed to capture a classic guitar tone.
When it comes to miking a guitar amp, there are several different approaches and all of them are very valid. However, it is considered a standard practice to use a dynamic microphone. What is a dynamic microphone? Dynamic microphones are robust, cheap, do not require a separate power source, and are perfect for close proximity miking. Dynamic mics handle high pressure levels well.
Condenser microphones, on the other hand are sensitive, expensive, and need a third-party power source. They are also a very valid recording choice, but not appropriate for everyone’s budget.
TIP: The most commonly used dynamic mic models are the Shure 57 & Sennheiser MD421.
Once you purchase a dynamic or condenser mic, you may now experiment with various miking techniques. As previously mentioned, several different options exist. For example, you may:
- place a single, dynamic mic close to the speaker
- place a single, dynamic mic, 6 to 12 inches from the speaker
- incorporate multiple close, dynamic mics
- combine close and distant mics
- or, utilize front and back miking for “open-backed” combo amps
Again, there is no right or wrong answer. The miking technique depends on the sound desired and even professionals will change their method on a case-by-case basis.
Let’s examine some of the more popular techniques listed above.
Single Dynamic Mic CLOSE to Speaker
The microphone is placed directly at the front-center of the speakers center. Set the mic so it nearly, but does not touch the front grill. Varying where, along the radius the mic is placed, will affect the tonality of the recorded sound. Placing it in the middle will result in a bright, punchy sound, while the closer the mic gets to the edge, the darker the tonality will sound.
Single Dynamic Mic, 6 – 12 inches from Speaker

Just like the same technique demonstrated above, only this time the microphone is slightly further from its source. You will capture more room ambiance with this method. It will also result in a more developed sound.
Multiple Mics CLOSE to Speaker

Recording the amp with different mics and blending the sound will result in more dynamic, richer tone. Some engineers will place one dynamic mic dead-center to the speaker and another on the edge. Engineers will also tilt one of the mics slightly off-axis, as this will give another variation to the sound.
Combination CLOSE and DISTANT Mics

If you also own a decent condenser microphone, this method is ideal. Place the dynamic mic(s) close to the amp and the more powerful and sensitive condenser, position anywhere from 6 inches to a few feet away.
Front and Back Miking with “Open-Backed” Combo Amps

Place a dynamic close to the amp and then place a condenser close to the back of the amplifier. The blend will create a nice mix, but keep in mind that this is an advanced technique and could introduce phase issues remedied only by a skilled engineer.
Posted in Courses, Guitar | 1 Comment »
May 12th, 2010
I promise you that The CAGED Method is not a name of a band (although that would be pretty sweet). The CAGED Method, is in fact, a simple way to learn the sheer basics of the guitar.
What is The CAGED Method?
It’s a method that is designed to get your fingers use to switching chords quickly and ultimately building up strength and dexterity in your hands. The method is titled as such because it educates the beginner guitarist on the main chords that are in the majority of songs. And what exactly are those chords? The C, A, G, E & D.
To learn more about each chord, click the following links: C, A, G, E, D. Or, keep reading to learn more about the CAGED method below.
The primary purpose of the CAGED system is to learn the fretboard. Guitarists who incorporate this technique will also learn just about any scale.
In order to begin, the guitarist should look at the octave shapes formed by the Root Notes of each of these chords. The Root Notes are the red notes above. It’s important that you learn these so well that you don’t need to think about them. As you get better at finding the notes on the fretboard you will find it easy to find these chords in any position almost instantly.
By removing all of the notes except for the octave shapes, you can see these patterns more clearly. Note that what you are left with are all the possible ways of fingering movable Octave Patterns.
If the guitarist proceeds to arrange the notes so that they form the word “CAGED,” the individual will then be able to chart every note on the entire fretboard.
GuitarSource.com provides one of the best examples of the CAGED technique.
If you practice these chord positions regularly until you know them by heart and make sure you practice them in all twelve keys, you will eventually master the CAGED technique. Practice and working on the twelve keys is incredibly important. If you can’t use them in all keys, then you are never going to see any benefit from using this method.
The other primary use of the CAGED system is to help with guitar solos. The chord shapes and positions learned through the CAGED method is instrumental in the foundation needed to discover chord tones, arpeggios, and scales anywhere on the fretboard. You can discover this wealth of information very quickly if you are indeed familiar with the method.
A great guitar solo isn’t just about choosing the right scale (that’s easy to do for most chord progressions) but is related to the accurate and creative use of chord tones. Scales can be put to good use in a decent guitar lead, however they are often used as the core, the foundation if you like. The best solo’s have character.
They always fit the music perfectly and most of the time this is done by knowing the best notes to use at the best time. Some have the “ear” for a guitar solo while others will learn the proper use of chord tones through practice techniques like The CAGED Method.
Posted in Chords, Courses, Scales | No Comments »
May 5th, 2010
Did you know an artist will make 95% of his or her revenue on stage?
The importance of a fantastic stage presence is vital to say the least. Yet, according to Alex Boye of Expert Village, the “talent” is often overlooked.

Before we get too detailed, one may ask, ‘What really is your stage presence?’
Good question.
One source defines your stage presence as “a performance skill—a quality defined by a performer’s ability to command the audience’s attention through projection, focus, attention, expression, confidence, and so on.”
Note the emphasis on “command.” A great entertainer will command the audience’s attention and thus win over their hearts. Consequently, the goal of this article is to learn how to command the audience. You do that and you’ll be fine.

Confidence. As Alex Boye said it, is extremely important. If you have it, you can “get away with a multitude of sins.” If you lack it, you’ll be lucky to survive before getting booed off stage.
Now, this may sound really easy but anyone who has been on stage before will beg to differ. When you are in the spotlight, in front of hundreds (if not thousands) of fans, your legs will begin to shake and your heart will feel like it’s about to pound out of your chest. This is common. It’s natural.
Everyone has nerves before they take the stage. Some may be more “natural” at having a great stage presence but nobody is perfect. Some of the world’s greatest performers will even tell you that a few butterflies before a show is a good thing. So do not run away from your nerves but embrace them.
My college speech teacher told me that you may “feel like crap” when you’re performing in front of others, but how you feel rarely translates to how you actually look. That is why so many speech classes in high school or college will tape the speech. It’s highly likely that the student will feel like they did a horrible job, but once they see the performance, they will agree that it actually was not as bad it may have initially appeared.
http://www.youtube.com/watch?v=bP2REjVaxZg"> http://www.youtube.com/watch?v=bP2REjVaxZg/0.jpg" alt="YouTube Preview Image" /> http://www.youtube.com/watch?v=bP2REjVaxZg/0.jpg" alt="YouTube Preview Image" />
Stage presence is actually an acquired skill that will improve with practice. Unfortunately, not everyone in the world has access to the city’s venue each week with thousands of fans. Thus, one must practice alone in front of such bizarre “audiences” as a mirror. You may look silly, but you can learn a lot by practicing in front of a mirror.
If you are a guitarist, it’s highly likely that you perform with a band. Sharing the stage with others may take some of the individual pressure off of yourself. However, the guitarist and singer (or singer/guitarist) are two of the most important positions in a band. Fans really dig the singer and they really dig the guitarist. Consequently, you must find an individualistic stage presence while matching with that of the band.
You need to command the audience, elude confidence, and without a doubt play good music – but one thing you no not want to do is act like a phony. You can spot a phony from a mile away. They try to “over do it.” Some may say, on the other hand, that a great stage presence is 100% natural and derives from playing music that you love and are passionate about. So just be natural. It makes for a great debate.
I believe it’s somewhere in between. A great live band has a stage presence that is both natural and well rehearsed. They know when to “stick to the script” and when to improvise.
Aspiring guitarists and bands can learn a lot from some of the greatest live bands of all-time. AskMen.com recently put together a top ten list and the number one spot belonged to Queen. As the web site accurately put it:
“Simply one of the greatest performers of all time, Freddie Mercury’s passion and theatrics could not be matched when he was up on stage. Singing himself beet-red in the face and acting out every lyric as if his life depended on it, seeing Mercury perform was a revelation.”

Spin.com begged to differ and placed U2 at the number one spot. Regardless, you can learn several tricks from many of the artists on these lists.

Posted in Guitar, Videos | 1 Comment »
|