Archive for the ‘Guitar’ Category
Wednesday, May 19th, 2010
The past decade has presented numerous technological advances to the music industry. From the equipment used to record music to the vary devices that we replay the music with – music technology is advancing more to the common man. It’s growing, changing, and evolving for the best.
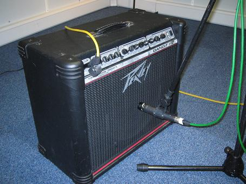
For example, in the past, a great guitar sound was reliant on owning a deluxe guitar amp, a quality microphone, and a decent studio or room. These days, with a simulation unit such as a Line6 pod, and a PC, musicians may digitally record a convincing guitar from their very own bedroom.
This proven, but highly undiscovered technique is a hidden gem in the guitar world. Guitarists no longer need an expensive amp to, no pun intended, create a rich sound. You also do not have to own/rent a studio to be able to crank that amp to the kind of volume needed to capture a classic guitar tone.
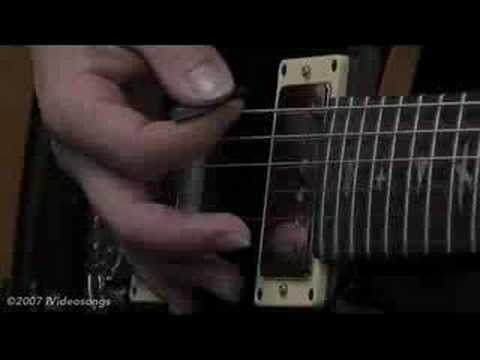
When it comes to miking a guitar amp, there are several different approaches and all of them are very valid. However, it is considered a standard practice to use a dynamic microphone. What is a dynamic microphone? Dynamic microphones are robust, cheap, do not require a separate power source, and are perfect for close proximity miking. Dynamic mics handle high pressure levels well.
Condenser microphones, on the other hand are sensitive, expensive, and need a third-party power source. They are also a very valid recording choice, but not appropriate for everyone’s budget.
TIP: The most commonly used dynamic mic models are the Shure 57 & Sennheiser MD421.
Once you purchase a dynamic or condenser mic, you may now experiment with various miking techniques. As previously mentioned, several different options exist. For example, you may:
- place a single, dynamic mic close to the speaker
- place a single, dynamic mic, 6 to 12 inches from the speaker
- incorporate multiple close, dynamic mics
- combine close and distant mics
- or, utilize front and back miking for “open-backed” combo amps
Again, there is no right or wrong answer. The miking technique depends on the sound desired and even professionals will change their method on a case-by-case basis.
Let’s examine some of the more popular techniques listed above.
Single Dynamic Mic CLOSE to Speaker
The microphone is placed directly at the front-center of the speakers center. Set the mic so it nearly, but does not touch the front grill. Varying where, along the radius the mic is placed, will affect the tonality of the recorded sound. Placing it in the middle will result in a bright, punchy sound, while the closer the mic gets to the edge, the darker the tonality will sound.
Single Dynamic Mic, 6 – 12 inches from Speaker

Just like the same technique demonstrated above, only this time the microphone is slightly further from its source. You will capture more room ambiance with this method. It will also result in a more developed sound.
Multiple Mics CLOSE to Speaker

Recording the amp with different mics and blending the sound will result in more dynamic, richer tone. Some engineers will place one dynamic mic dead-center to the speaker and another on the edge. Engineers will also tilt one of the mics slightly off-axis, as this will give another variation to the sound.
Combination CLOSE and DISTANT Mics

If you also own a decent condenser microphone, this method is ideal. Place the dynamic mic(s) close to the amp and the more powerful and sensitive condenser, position anywhere from 6 inches to a few feet away.
Front and Back Miking with “Open-Backed” Combo Amps

Place a dynamic close to the amp and then place a condenser close to the back of the amplifier. The blend will create a nice mix, but keep in mind that this is an advanced technique and could introduce phase issues remedied only by a skilled engineer.
Posted in Courses, Guitar | 1 Comment »
Wednesday, May 5th, 2010
Did you know an artist will make 95% of his or her revenue on stage?
The importance of a fantastic stage presence is vital to say the least. Yet, according to Alex Boye of Expert Village, the “talent” is often overlooked.

Before we get too detailed, one may ask, ‘What really is your stage presence?’
Good question.
One source defines your stage presence as “a performance skill—a quality defined by a performer’s ability to command the audience’s attention through projection, focus, attention, expression, confidence, and so on.”
Note the emphasis on “command.” A great entertainer will command the audience’s attention and thus win over their hearts. Consequently, the goal of this article is to learn how to command the audience. You do that and you’ll be fine.

Confidence. As Alex Boye said it, is extremely important. If you have it, you can “get away with a multitude of sins.” If you lack it, you’ll be lucky to survive before getting booed off stage.
Now, this may sound really easy but anyone who has been on stage before will beg to differ. When you are in the spotlight, in front of hundreds (if not thousands) of fans, your legs will begin to shake and your heart will feel like it’s about to pound out of your chest. This is common. It’s natural.
Everyone has nerves before they take the stage. Some may be more “natural” at having a great stage presence but nobody is perfect. Some of the world’s greatest performers will even tell you that a few butterflies before a show is a good thing. So do not run away from your nerves but embrace them.
My college speech teacher told me that you may “feel like crap” when you’re performing in front of others, but how you feel rarely translates to how you actually look. That is why so many speech classes in high school or college will tape the speech. It’s highly likely that the student will feel like they did a horrible job, but once they see the performance, they will agree that it actually was not as bad it may have initially appeared.
http://www.youtube.com/watch?v=bP2REjVaxZg"> http://www.youtube.com/watch?v=bP2REjVaxZg/0.jpg" alt="YouTube Preview Image" /> http://www.youtube.com/watch?v=bP2REjVaxZg/0.jpg" alt="YouTube Preview Image" />
Stage presence is actually an acquired skill that will improve with practice. Unfortunately, not everyone in the world has access to the city’s venue each week with thousands of fans. Thus, one must practice alone in front of such bizarre “audiences” as a mirror. You may look silly, but you can learn a lot by practicing in front of a mirror.
If you are a guitarist, it’s highly likely that you perform with a band. Sharing the stage with others may take some of the individual pressure off of yourself. However, the guitarist and singer (or singer/guitarist) are two of the most important positions in a band. Fans really dig the singer and they really dig the guitarist. Consequently, you must find an individualistic stage presence while matching with that of the band.
You need to command the audience, elude confidence, and without a doubt play good music – but one thing you no not want to do is act like a phony. You can spot a phony from a mile away. They try to “over do it.” Some may say, on the other hand, that a great stage presence is 100% natural and derives from playing music that you love and are passionate about. So just be natural. It makes for a great debate.
I believe it’s somewhere in between. A great live band has a stage presence that is both natural and well rehearsed. They know when to “stick to the script” and when to improvise.
Aspiring guitarists and bands can learn a lot from some of the greatest live bands of all-time. AskMen.com recently put together a top ten list and the number one spot belonged to Queen. As the web site accurately put it:
“Simply one of the greatest performers of all time, Freddie Mercury’s passion and theatrics could not be matched when he was up on stage. Singing himself beet-red in the face and acting out every lyric as if his life depended on it, seeing Mercury perform was a revelation.”

Spin.com begged to differ and placed U2 at the number one spot. Regardless, you can learn several tricks from many of the artists on these lists.

Posted in Guitar, Videos | 1 Comment »
Thursday, April 29th, 2010
The guitar is truly a beautiful instrument. Not only does it sound amazing, but the appearance is nearly as sacred. However, the beauty of the guitar does not come easy. Guitars take money, resources, and time to build. Yet, hundreds if not thousands of individual parties complete this task each year.
If you have ever had the itch to build your own custom guitar, the point of today’s post is to give you a little background into what you will need and what it will take to accomplish this feat.
Tools
For a fantastic video demonstration of the tools you’ll need to build a guitar, check out the video below…

Types of Wood
Now that you have a solid understanding of the tools you’ll need; the next step is to select a type of wood. The most important part of building a fine instrument is the material, and for the guitar, that material is the wood. The finest guitars are made from solid pieces of some of the best pieces of wood in the world. Cheap guitars are built from laminate woods, or plywood covered with a laminate wood veneer. A quality instrument is always built from only the finest solid woods such as:
Brazilian Rosewood
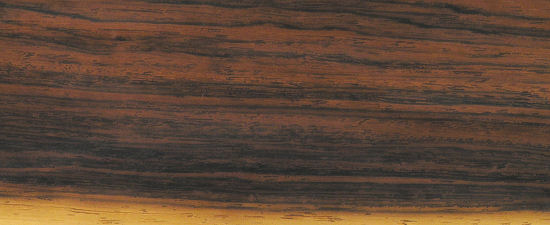
Brazilian Rosewood, like the name implies, derives from trees that grow in the forests of Brazil. Because of deforestation and overexploitation, the wood has now became illegal to ship outside of the United States. Due to its rarity and terrific acoustical properties, Brazilian Rosewood is one of the most coveted materials for the back and sides of a fine guitar.
Hawaiian Koa

Hawaiian Koa is a beautiful golden brown wood that has long been considered a prized wood. Natives often made canoes and furniture from the Koa, however guitar enthusiasts seek the wood for another reason. Hawaiian Koa provides a very warm and rich sound, making it ideal for acoustic performances. Unfortunately, just like the Brazilian Rosewood, Hawaiian Koa is really rare and hard to purchase.
Bubinga

Bubinga is an African wood (often called African rosewood) and another prized material for fine guitars. Bubinga is available in a variety of colors including reddish hues, reddish-brown hues, and even a brownish violet hue. Bubinga is also used in other instruments such as harps, basses, and even drums. The wood provides a mellow, dense, and well-rounded tone for a guitar.

Design & Planning
You must understand a few important rules to building guitars before you can design the guitar. The first and most important is the scale length. The scale length “is the length the string travels between the nut at the top of the fretboard and the bridge at the mid section of the base of the guitar.” In order to determine the scale length of your guitar, the individual must measure from the front part of the nut (where it meets the fretboard) to the center of the 12th fret on the neck. Then, the individual must multiply that length by two. For more information on this step, Click Here!

As with any major construction project, it’s always best to pre-plan your design concept in order to ensure that some mistakes are avoided later in the construction phase.
Ready for More…
If constructing your very own custom guitar is something that you’ve always wanted to do and the above information did not steer you away – what is stopping you from creating your very own guitar?
Instructables has a very informative piece on building your own guitar. The article breaks down the process into each step while providing additional information and diagrams. Click Here!
Also, Expert Village’s partnership with Frank Pope of FBI Guitars provides a very detailed account of the guitar construction process. Click Here!
Posted in Guitar, Videos | No Comments »
Tuesday, April 27th, 2010
For those of you who are new to the guitar, you may be wondering what exactly is a “guitar tab”?
Great question.
A guitar tab is a term used by guitarists that derives from the word “tablature,” or “a form of musical notation indicating instrument fingering rather than musical pitches.”
Huh?
Several years back, someone came up with an idea that would help amateur guitarists learn songs quicker. And thus the “guitar tab” was born. Guitar tabs provided an ideal alternative to reading actual sheets of music. We like to call it “Sheet Music for Dummies.” Instead of attempting to read the notes and break down the content that way, some genius (or geniuses) discovered a way that even a ten year old could understand.
The guitar tab has saved or destroyed the industry depending on the person you ask. The purists view it as “an easy way out.” The 21st generation appears to generally accept it as the way of the future.
Fun Fact: Did you know that the term “tablature” originates from the Latin word “tabulatura”? In Latin, tabula is a table or slate. To tabulate something means to put it into a table or chart.
While standard musical notation represents the rhythm and duration of each note and its pitch relative to the scale based on a twelve tone division of the octave; tablature is instead operationally based, indicateing where and when a finger should be placed to generate a note. Thus, the pitch is denoted implicitly rather than explicitly.
The rhythmic symbols of tablature inform the musician when to start a note, but usually do no indicate when to stop sounding it. Consequently, the duration is at the discretion of the performer to a greater extent than is the case in conventional musical notation.
When dealing with guitar tabs, the number of resources available on the web are incredibly diverse. However, while this wealth of knowledge is generously available to anyone – it does not exactly mean that all guitar tabs posted on the web are A) correct, B) correct, and C) correct.
The Guitar Tab
Below is a guitar tab from the Red Hot Chili Peppers that was posted on GuitarTab.com:
Artist: Red Hot Chili Peppers
Album: By The Way
Song: Zephyr Song
h = hammer
b = bend
x = scratch
r = release
———————————————–
Intro
e|—————————————————————————-|
B|———————————————————————5——|
G|——-12——–10——-4——-5———9——–7——-4——-5——|
D|—-10———9——–5——-7——–10——–9——-5——-7——–|
A|-12———10——–7——-8——-12——–10——-7——-8———-|
E|—————————————————————————-|
Verse
e|—————————————————————————-|
B|—————————————————————————-|
G|——-9—–12–10–9———-7—–10–9–7——–4——7—5—4——|
D|—-10——————–9———————–5————————-|
A|-12——12————10———10————7———7—————–|
E|—————————————————————————-|
e|—————————————————————————-|
B|——————————————————————10——–|
G|——–5—7h9–7–5–5b———–9——12–14—9———7—10–9–7–|
D|—-7—————————10————————-9—————-|
A|-8————————–12———12————–10——————-|
E|—————————————————————————-|
e|—————————————————————————-|
B|——————–5——————————————————-|
G|——–4——-7——-5—–4–5——4–5————–9——12–10-—9–|
D|—-5————————————————-10——————–|
A|-7———7—————8——–8———8—12———12————-|
E|—————————————————————————-|
e|—————————————————————————-|
B|—————————————————————————-|
G|——–7—–10–9–7——–4——7—5—4——–5—7h9–7–5b———-|
D|—–9——————–5——7—————–7————————|
A|-10——-10———–7————————8—————————|
E|—————————————————————————-|
e|—————————————————————————-|
B|———————————–10————————5————5-|
G|——–9—–12–14–9——–7—10–9–7——-4—-7–9–5—4-5—4–5-|
D|—-10———————-9——————5—-7———————–|
A|12——–12————10——————7——————8—–8——|
E|—————————————————————————-|
Chorus
e|————5—-5———–5—-5—————————————–|
B|–7———3—-5—–7—–3—-5—————————————–|
G|–7———4—-6—–7—–4—-6—————————————–|
D|–7———5—-7—–7—–5—-7—————————————–|
A|–5———x—-x—–5—–x—-x—————————————–|
E|————3—-5———–3—-5—————————————–|
Interlude:
e|——————————————————————————–|
B|——————————————————————————–|
G|——–9—-12–10–9——-7—-10–9–7——4—-7–5—4——–5—7h9–7–5|
D|—-10——————–9——————5——————–7————-|
A|-12——-12———–10——10———-7——7————8—————-|
E|——————————————————————————–|
Verse 2
e|——————————————————————————–|
B|——————————————————————————–|
G|——-9—–12–10-9——7——10–9–7–9—–4—7-5-4-5—–5-7h9-7-5-7h9-|
D|—-10——————-9———————-5—————7—————|
A|-12——-12———-10——10————–7—–7———8—————–|
E|——————————————————————————–|
e|—————————————————————————–|
B|——————————–10———————5—————-5—-|
G|——–9—–12–14–9——7–10–9–7—–4—-7-9–5—-4–5—–4–5—-|
D|—-10———————9—————5———————————|
A|-12——-12————10—————7—–7———-8——-8———-|
E|—————————————————————————–|
Chorus 2
e|——5—5———–5—5—————————————-5–5–5–5-5-|
B|–7—3—5—–7—–3—5—-7–7-7–7–7–7–7-7–7–7–7–x-x–3–3–3–3-3-|
G|–7—4—6—–7—–4—6—-7–7-7–7–7–7–7-7–7–7–7–x-x–4–4–4–4-4-|
D|–7—5—7—–7—–5—7—-7–7-7–7–7–7–7-7–7–7–7–x-x–5–5–5–5-5-|
A|–5—x—x—–5—–x—x—-5–5-5–5–5–5–5-5–5–5–5–x-x–x–x–x–x-x-|
E|——3—5———–3—5—————————————-3–3–3–3-3-|
e|-5–5–5–5—-5————————————–5–5–5–5-5–5–5–5–5—-5-|
B|-7–7–7–7–7–7–7-7–7–7–7–7-7–7–7–7–x-x–3–3–3–3-3–7–7–7–7–7-|
G|-6–6–6–6–6–7–7-7–7–7–7–7-7–7–7–7–x-x–4–4–4–4-4–6–6–6–6–6-|
D|-7–7–7–7–7–7–7-7–7–7–7–7-7–7–7–7–x-x–5–5–5–5-5–7–7–7–7–7-|
A|-x–x–x–x–x–5–5-5–5–5–5–5-5–5–5–5–x-x–x–x–x–x-x–x–x–x–x–x-|
E|-5–5–5–5–5————————————–3–3–3–3-3–5–5–5–5–5-|
Solo
e|-12–10–12–12-|-12–10–12—-8–7-|-5–10–8–10–10–10-8-|-10—12–8—7–5|
B|—————-|—————–|———————-|——————-|
G|—————-|—————–|———————-|——————-|
D|—————-|—————–|———————-|——————-|
A|—————-|—————–|———————-|——————-|
E|—————-|—————–|———————-|——————-|
e|-12–10–12-12-|-10—-12–8-7-5-|-10–8–10—10–10–8-|-10–12—-8–7–5–0—-|
B|—————-|—————–|———————-|——————-|
G|—————-|—————–|———————-|——————-|
D|—————-|—————–|———————-|——————-|
A|—————-|—————–|———————-|——————-|
E|—————-|—————–|———————-|——————-|
Bridge
e|–7–7–7–7–7–7–7–x-x—5–5–5–5–5–5–5–x-x–0–0-0–0-0–0-0–0-0–|
B|–5–5–5–5–5–5–5–x-x—3–3–3–3–3–3–3–x-x–0–0-0–0-0–0-0–0-0–|
G|–5–5–5–5–5–5–5–x-x—4–4–4–4–4–4–4–x-x–0–0-0–0-0–0-0–0-0–|
D|–7–7–7–7–7–7–7–x-x—5–5–5–5–5–5–5–x-x–2–2-2–2-2–2-2——-|
A|——————————————————————————|
E|——————————————————————————|
e|-5–5–5–5–5–5–5–5–5–5–7—7–7–7–7–7–7–7–x-x–5–5–5–5–5–5-|
B|-8–8–8–8–8–8–8–8–8———5–5–5–5–5–5–5–x-x–3–3–3–3–3–3-|
G|-5–5–5–5–5–5–5–5–5———5–5–5–5–5–5–5–x-x–4–4–4–4–4–4-|
D|-7–7–7–7–7–7–7–7–7———7–7–7–7–7–7–7–x-x–5–5–5–5–5–5-|
A|-8–8–8–8–8–8–8–8–8—————————————————-|
E|——————————————————————————|
e|-5–x-x–0–0–0–0–0–0–0–0–0–5———————————–|
B|-3–x-x–0–0–0–0–0–0–0–0–0–8———————————–|
G|-4–x-x–0–0–0–0–0–0–0–0–0–5———————————–|
D|-5–x-x–2–2–2–2–2–2–2——–7———————————–|
A|————————————8———————————–|
E|————————————————————————|
Bridge 2
e|——5—5——-5—5————————————x-x—–|
B|–7—3—5—7—3—5—7–7–7–7–7–7–7–7–7–7–7–x-x—–|
G|–7—4—6—7—4—6—7–7–7–7–7–7–7–7–7–7–7–x-x—–|
D|–7—5—7—7—5—7—7–7–7–7–7–7–7–7–7–7–7–x-x—–|
A|–5—x—x—5—x—x—5–5–5–5–5–5–5–5–5–5–5———-|
E|——3—5——-3—5——————————————–|
e|-3–3–3–3–3–3–3—5–3–5——————————————|
B|-3–3–3–3–3–3–3—5–3–5——————————————|
G|-4–4–4–4–4–4–4—6–4–6——————————————|
D|-5–5–5–5–5–5–5—7–5–7——————————————|
A|-x–x–x–x–x–x–x—x–0–x——————————————|
E|-3–3–3–3–3–3–3—5—–5——————————————|
e|——5—5——-5—5—3–3–3–3–3–3–3–3—5–5–5–5–5–5–5–5–|
B|–7—3—5—7—3—5—3–3–3–3–3–3–3–3—5–5–5–5–5–5–5–5–|
G|–7—4—6—7—4—6—4–4–4–4–4–4–4–4—6–6–6–6–6–6–6–6–|
D|–7—5—7—7—5—7—5–5–5–5–5–5–5–5—7–7–7–7–7–7–7–7–|
A|–5—x—x—5—x—x—x–x–x–x–x–x–x–x—x–x–x–x–x–x–x–x–|
E|——3—5——-3—5—3–3–3–3–3–3–3–3—5–5–5–5–5—-5–5–5–|
e|–14———-14——–14——-14——–14—————15———15–|
B|——15———15——–15——-15——–15———15——–15——|
G|———-14——–14——–14——-14——–14—16——–16———|
D|—————————————————————————|
A|—————————————————————————|
E|—————————————————————————|
e|————–17————-14——–14——–14——–14——–14-|
B|—-15—–17————-15——–15——–15——–15——–15—-|
G|-16—–18——–18—14——–14——–14——–14——–14——-|
D|————————————————————————|
A|————————————————————————|
E|————————————————————————|
e|——-15——–15—————-17—-15–17———-14——–14—-|
B|—-15——–15——–15——17——-15–17——-15——–15——-|
G|-16——–16——–16——18———-16–18—-14——–14———-|
D|————————————————————————-|
A|————————————————————————-|
E|————————————————————————-|
e|——-14——–14——–14——–15——–15—————17——-17-|
B|—-15——–15——–15——–15——–15——–15—–17——-17—-|
G|-14——–14——–14——–16——–16——–16—–18——-18——-|
D|—————————————————————————-|
A|—————————————————————————-|
E|—————————————————————————-|
e|————14——–14——–14——–14——–14——–15——–15–|
B|———15——–15——–15——–15——–15——–15——–15—–|
G|-18—14——–14——–14——–14——–14——–16——–16——–|
D|—————————————————————————-|
A|—————————————————————————-|
E|—————————————————————————-|
e|———17———17—————————————————|
B|—-15—17———19—————————————————|
G|-16——18———18—————————————————|
D|————————————————————————-|
A|————————————————————————-|
E|————————————————————————-|
If you have never seen a guitar tab before, the above language may look like something fresh off the Matrix. Fortunately, it’s not nearly as complicated. And the acting is much better…
The guitar tab presents the six strings on the guitar, starting with the high e and working all the way down to the low E. The number on each string is the fret at which you play the note. So, for example, if it reads “6″ on A, the guitarist will locate the A string and slide down six frets from the top of the guitar neck. Boom! That’s your note.
If the numbers are stacked on top of each other (as is the case with a lot of “Zephyr”), the tab is informing you to play a chord. Place all your fingers on the strings (according to the tab) and strum. Boom! That’s your chord. Most guitar tabs will provide a key at the top, just like the one for “Zephyr.” An “o” will generally indicate a string you play with the chord that is open. Other symbols like “h” (hammer on), “b” (bend), and “r” (release) are used to describe advanced guitar techniques.
There are numerous benefits to guitar tabs with the most important being an easy way to learn a song when you cannot read sheet music. However, there are also several disadvantages to guitar tabs. Guitar tabs are easy to pick-up, but as we mentioned previously, they’re not always 100% correct. Most guitar tab web sites do provide a rating system in which users can rate the accuracy of each guitar tab. Use this to your advantage and only consult guitar tabs with a 5 star rating (from four or more individuals).
Also, guitar tabs fail to tell you how long you should play a specific note or chord. If you are very familiar with the song, the length of the note or chord should come fairly natural. The best recommendation is to listen to the actual recording while you attempt to learn the song.
Produce Your Own Guitar Tabs
As you become more proficient with the guitar, you may or may not desire to produce your own guitar tabs. If this is something that you would like to do eventually, please take the task seriously. It’s important to remember that your tab could possibly educate hundreds if not thousands of others on the specific song. You need to treat the tab with care.
1. Be accurate. This is by far the most important rule. If the tablature or chords are not correct then the guitar player will fail to learn. Play along with the song and ensure that every note is 100% accurate. Also, make sure you provide additional details such as if a capo or a different tuning is required.
2. Use correct chord names. Every combination of notes has a name so make sure you find the right one for each chord. Otherwise, if the chord is used in another person’s tab correctly, it will sound wrong and probably upset the guitarist.
3. Be a fan. The reader will trust your tab(s) more if they know it is coming from someone who really enjoys the band song. The first thing in your tab after the song name and artist should be a short sentence about how much you like this song and/or artist.
4. Do not be meticulous. Guitar players do not want to be treated like babies, so do not try to map out every single beat and tell them when to use upstroke/downstroke. The beginner guitarist that is reading your tab has more than likely already heard the song and is familiar with the content.
5. Tab a new song. You will find that a lot of songs are “tabbed” over and over again. This is done for a reason. The song is very popular and a lot of people want to learn how to play it. However, how many people do you think will truly consult your tab when a million other “Hotel California” tabs exist. Tab a new song or one that does not have many tabs on the internet.
Fun Fact: According to Mxtabs.net, “Stairway to Heaven” by Led Zeppelin is by far the most coveted of all guitar tabs.
Posted in Chords, Guitar | No Comments »
Saturday, April 24th, 2010
Regardless of the amount of time you have dedicated to the guitar, a lot of people tend to assess their skill level on the amount of songs they know how to play. While this “side by side” comparison makes sense, it also is not the most accurate way of dictating who can truly play the guitar.
It’s useful to learn songs - just as it’s vital to learn chords, bends, hammer on’s, and solos. Learning to play an actual song is highly valued because it often incorporates one or more of the above techniques while serving as a way to impress friends and loved ones.
For those of you who own an acoustic guitar, the decision of the song you want to learn may be different from one who owns an electric guitar. You more than likely purchased an acoustic guitar over an electric guitar for a number of different reasons. The most common reason people choose acoustic over electric is due to the genre or type of music they eventually want to play.
Acoustic guitars are synonymous with country, folk, bluegrass, and the occasional pop hit. Electric guitars, meanwhile, are more sought after in the modern, hard, and metal rock genres. Thus, beginner songs for the amateur guitarist vary based on the type of guitar you are using.
The five songs listed below are all fantastic beginner songs for the acoustic guitar. Each of the five songs below only incorporate two different chords throughout the entire song, thus allowing little time to transition while learning a few of the basic chords.
- Beginner Songs for Acoustic Guitar -
1. Oh My Darlin’ Clementine
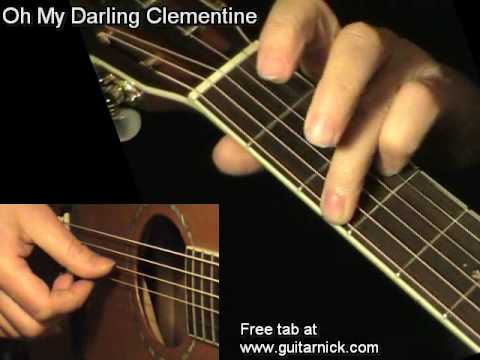
If you grew up with the Huckleberry Hound cartoons, then you surely know the song “Oh My Darlin’ Clementine.” The song tells the story of a bereaved lover who lost his darling in the 1849 California Gold Rush and is also a prime candidate for the beginner acoustic guitarist. You can play this song with the D and A7 chords and use a 3/4 strum pattern. ”Oh My Darlin’ Clementine” also sounds nice with a bass strum, as the guitarist will now pick the fourth string on beat one of the D chords then strum twice, pick the fifth string on beat one of A7 chords, and strum twice.
2. Hush Little Baby

“Hush Little Baby” is a another well-known song that’s easy to play. “Hush Little Baby” is a traditional lullaby in the ‘question and answer’ format. The lullaby was/and still is popular with parents as the lyrics promise all kinds of rewards to the child that is quiet. In order to play “Hush Little Baby,” use the C and G chords and a 4/4 up and down strum pattern.
3. Eleanor Rigby

You may have thought that “two chord songs” are just for cartoon shows and lullabies, but you are indeed very wrong. Even a band as famous and critically renown as The Beatles used “two chord songs” every now and then. Take “Eleanor Rigby” for example. The song is very simple when stripped down to its musical content, but still a favorite from many of the Beatles faithful (ranked 137th in Rolling Stone’s 2004 list of the “500 Greatest Songs”). The song is a haunting tune about loneliness (from the 1966 album Revolver) and one you can play with the chords C and Em.
4. Paperback Writer
Paul McCartney’s goal with “Paperback Writer” was to create a song with a melody backed by only a single chord. Well, it turns out, Sir Paul just missed the mark by one chord. ”Paperback Writer” was the Beatles eleventh single in 1966 and went to number one in several countries. McCartney may have missed his goal, but he still left us with a lively and dynamic acoustic guitar song that is perfect for beginners. The verse is played on a single G7 chord until ending on a C.
5. Born In The USA

“Born in the U.S.A.”, a more recent hit from Bruce Springsteen, is still regarded as one of his greatest songs ever. Widely thought of as a patriotic anthem, the song does in fact educate the audience on the effects of the Vietnam War from the point of view of a veteran. The song ranked 275th on Rolling Stone’s list of the “500 Greatest Songs of All Time.”
In order to play “Born in the U.S.A.”; utilize the 4/4 time as you alternate between the B and E chords every two lines during the verses. For the chorus, play B for two “Born in the U.S.A.’s”, then E for the third, and finally B for the last.
Posted in Genre, Guitar | No Comments »
Wednesday, April 14th, 2010
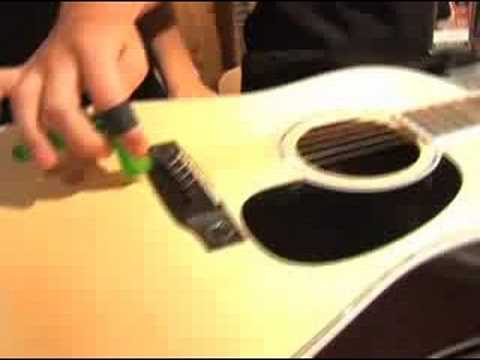
Are the strings on your guitar discolored or rusty? Maybe more importantly, are all six strings present and accounted for? If you answered NO to either of the two questions or if it’s been several months since you put new strings on the guitar, it’s time for a string change.
How often should you change the guitar strings? Just like the brake pads on a car, guitar strings wear out with use. Old guitar strings often behave badly (aka they’ll lose tuning more quickly, sound less “bright”, and give you problems with intonation). Bottom line, if you play the guitar – you need to change the strings every A) couple of months if you play casually and B) every two weeks if you play professionally at gigs, etc.
If you own an acoustic guitar, you need “acoustic guitar strings”. If you own a classical guitar, you need “classical guitar strings” or “nylon strings”. An electric guitar, thus, requires ”electric guitar strings.” If you have yet to get the hint, each guitar requires different strings.
When you go to change the guitar strings, you also must consider the gauge. What is the gauge? It’s basically the thickness of the strings. While every guitarist is different, medium gauge is the recommended level for beginners as you can adjust accordingly upon performance.
Guitar strings, regardless of the gauge and brand, should set you back no more than $8-$16.
Steps Needed to Change the Strings:
1. Once you’ve completely loosened the 6th string, unwind it from the tuning peg and remove from the guitar. Some individuals find it easier to snip the string in half with pliers and then remove. Make sure you ONLY REMOVE one string at a time. Removing all six strings at once will drastically change the pressure exerted on the neck. The result? Seriously damage to your instrument.
Before moving on, take a few minutes to clean the newly exposed areas of the guitar.
2. Locate the new sixth string (the heaviest of all six) and unravel from the packaging. Feeding the new string through your guitar varies from instrument to instrument. For some electric guitars, you’ll simply feed the string through the tailpiece, in a manner similar to stringing an acoustic guitar. For quite a few other electric guitars, however, the guitarist will feed the new string through the body of the instrument. Flip the guitar over, and locate the appropriate hole to feed the new string through.
3. Flip the instrument over after you’ve successfully fed the string through the body of the guitar. Then, pull the entire length of the string through the bridge.
4. Rotate the tuner for the sixth string, so the hole in the tuning peg forms a right angle to the neck of the instrument. Now, bring the string up the neck of the guitar. Pull the string fairly taught, and using your eye to estimate, measure about one-and-a-half inches past the tuning peg. Crimp the string lightly at that point, so the end of the string points out at a right-angle.
5. Slide the string through the hole in the tuning peg, up to the point where the string is crimped. The end of the string should point outwards, away from the center of the headstock. You may want to crimp the other side of the string emerging from the tuning peg , in order to hold the string in place. Then, turn the tuner in a counter-clockwise direction to wind the new string, using your string winder (if applicable). As it tightens, look down the length of the guitar, and be sure the string is sitting properly on the bridge of the guitar.
6. Slide the string through the hole in the tuning peg, up to the point where the string is crimped. The end of the string should point outwards, away from the center of the headstock. You may want to crimp the other side of the string emerging from the tuning peg (see photo), to better hold the string in place. Begin turning the tuner in a counter-clockwise direction to wind the new string, using your string winder (if you have one). As it tightens, look down the length of the guitar, and be sure the string is sitting properly on the bridge of the guitar.
7. In order to control how the string wraps around the tuning peg, it will help to remove slack in the string. As you continue to slowly wind the new string, take the index finger of your free hand and push down slightly on the string, against the fretboard of the guitar. With the remaining fingers in that hand, grasp the string, and gently pull up and back in the direction of the guitar’s bridge. If you pull too hard, you’ll pull the string out of the tuning peg altogether.
8. Guitarists prefer a different method of wrapping their strings around the tuning peg. Some prefer their first wrap-around to go above the exposed end of the string, and then cross over, with all subsequent coils falling below the string end. Your primary concern should be making sure there are several full coils of string wrapped around each tuning peg.
9. Once you’ve successfully wrapped the string around the tuning peg, bring the string into approximate tune. When completed, take your pliers and snip off the excess string protruding from the tuning peg. Leave approximately 1/4″ of the string, to prevent slippage.*
* – Repeat steps for the next five strings.
Note: Initially, this new string may have trouble staying in tune. You can help correct this problem by stretching out the new string. Grab the string, and pull it approximately one inch away from the surface of the guitar. The pitch of the string will probably have dropped. Re-tune the string, then repeat the process, until the string no longer falls out of tune.
Posted in Guitar, Tuning | 1 Comment »
Wednesday, April 7th, 2010
Fret NOT…
Welcome to the second edition of guitar tuning done well. In the first article, we examined the why you want to tune your guitar, when you need to tune it, and what you can tune your guitar with. Guitar Critic examined the most popular guitar tuning instruments and techniques, yet we were unable to cover them all.
Let’s take a look at some other approaches:
Relative Tuning: The musician tunes each of the strings from the previous string. Basically, you do not have enough money or resources for a “professional” tune so you’re looking to act off instinct. Relative tuning is ideal for situations in which you are in a bind and must prep the instrument quickly. You can tune your guitar completely by this method and it will sound good as long as you are by yourself. If there is another guitar playing with you, however, yours will not blend with the other guitar and thus the sound will not be good.
The best way to remain accurate with relative tuning is to reference the “A” 5th string and can be done with one of the methods described below:
- To do this you employ the 5-5-5-4-5 method. For each of the 6th, 5th and 4th strings use the fifth fret. For example, if you take the fifth ft. of the 6th string you will get the “A” note. So if you play the 6th string from the fifth fret is should have the same tone as the 5th string played open (with no fret).
- Next you take the fifth ft. of the 5th string and strum producing a “D” note which is the same note as strumming the 4th string open (no fret). If they are not in tune you drop the 4th string below the note and slowly tighten it until it produces a “D” note.
- Then strum the 4th string at the fifth ft. and the 3rd string open which should produce a “G” note if the 3rd string is in tune. If not, take the 3rd string below the note and slowly tighten it until it equals the “G” note produced by the 4th.
- For the 3rd string you must strum it at the fourth ft. and the 2nd string open to produce a “B” note if the 2nd string is in tune. If it is not in tune, tune the 2nd string as the previous strings.
- For the last step, strum the 2nd string at the fifth ft. and the 1st string open to produce the “E” note and adjust as above if the 1st string is out of tune.
Finally check your tuning by strumming one of the cords.
Tuning by Harmonics: Lightly touch the two strings at the frets without pressing the strings down. Then, pluck the two strings and release the frets immediately. You need to touch the fifth ft. of the first string and the seventh ft. of the second string. As an example, use the fifth ft. of string #6 and the seventh ft. of string #5. If they are both in tune you will hear one melodic tone. If one string is out of tune you will hear a pulsing or oscillating of the note.
Tuning Fork or Pitch Pipe: Although you may have never heard of a tuning fork or pitch pipe both are available and cheaper than an electronic tuner. A tuning fork or pitch pipe for the note “A” has a frequency of 440 (vibrations per second.) The drawback here is that you must tune the 5th string, A, to the fork or pipe and then tune each of the other strings by ear in order from that one.

From Another Guitar: With this method you use a guitar that you know is in tune to tune your E, 5th string and then tune the rest of your strings by ear from that one.
From an Internet Tuning Source: Just like every ting else, the internet is stuffed full with online tuning references. If you have a good set of speakers on your computer you should be able to do a respectable job of tuning your guitar.
Click Here! for an outstanding online guitar tuner…
Posted in Guitar | No Comments »
Wednesday, March 24th, 2010
The title of this article may come off as a little strange.
‘I thought that the only way to make the instrument sound good was via someone who could actually play the guitar?’
Correct, but even in the hands of a professional, the guitar will only sound as good as the tune. Thus, you must tune the guitar for quality.
If you have ever observed the professionals, you’ll note that they are constantly tuning their beloved musical instrument. Why? Simply because the guitar gets out of tune often (even modern technology cannot fix this small vice). You’ll want to tune your guitar:
- After it’s been bought, regardless of whether it’s new or not.
- You’ve been playing with some big bends which may cause the tune to change.
- A string breaks.
- You travel with a instrument and the temperature changes, the guitar is bumped, etc
In other words, you’ll tune the strings a lot. Fortunately, several guitar tuning methods exist. You may tune the instrument with:
- an electronic tuner
- with a piano
- with a tuning fork or pitch pipe
- from another guitar that is fully tuned
- relative tuning
- by harmonics
- from an internet source
- or, via your phone
Today’s Fun Fact: Betcha really didn’t think the iPhone could “do it all.”
Regardless of however you tune the guitar, you must always start below the note and then ”tune up” to the note. Why? When you are loosening the string, the nut that keeps the string from loosening when you play may not let go of the string immediately. Thus, after you tune the string may ultimately be ”out of tune.” However, when you tighten the string, the nut has no effect because the string is already under tension.
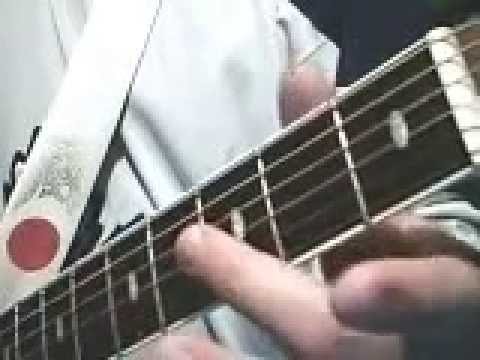
“The Standard Tune” is tuned to the notes E-A-D-G-B-E. Some guitarists create helpful little reminders like “Eric Archer Digs Great Breakfast Everyday.”
The “first E” (6th string) is at the top of your guitar but is technically the bottom string (because it’s the thickest). “A” is the next string (5th string), followed by ”D” (4th string), “G” (3rd string), “B” (2nd string), and the second “E” (1st string).
If you ask any professional guitarist, most will strongly recommend that you tune the strings in the following order: 3rd string, 4th string, 2nd string, 5th string, 1st string, and finally the 6th string. By tuning in this pattern, the guitarist eliminates stressing and twisting one side of the guitar neck.
While you may use several different methods to tune the instrument, innovative methods like the phone (dial tone is @ the pitch of A), are not nearly effective as say, the electric tuner. While electric tuners are expensive, they are by far the best and most accurate method. For a price of $20-$50, the guitarist may plug the electric guitar directly into the tuner and use the analog or digital device (most professionals prefer the analog needle) to read the note until it reaches the desired position.
The piano is also a very useful for guitar tuning if you are blessed with such a beautiful instrument. On March 31st, Guitar Lessons Critic will break down guitar tuning into a more detailed approach that utilizes such methods as relative tuning and tuning by harmonics. We’ll also examine some of the top guitar tuning devices on the web, such as the one located on Gieson.
Posted in Guitar, Tuning | 1 Comment »
Thursday, March 11th, 2010
It doesn’t take a genius to discover that the vast majority of lessons and guitar content on the web is directed toward the “beginner guitarist.” While this makes perfect sense, it does arrive as a frustration for the “intermediate to advanced guitarist” searching to take their level of play to an even higher level.
Beginner guitar lessons and content are easy because a lot of people need this information (think of how many “guitar made easy” lessons you’ve been flooded with of late). Over time, you’ll get to a point where you no longer need the help of others to play. Yet, I’m sure those intermediate and advanced guitarists are searching for a form to learn those advanced techniques. Intermediate to advanced guitarists need a challenge, because nothing is as frustrating as reaching a plateau and no longer feeling the need or means to improve.
Guitarists all around the globe face this problem. The question, then, is what do we do to continue and improve our skills? Intermediate to advanced musicians need a focus. Ask yourself these questions:
- What do I realistically want to do with the guitar? Do I want to use the guitar as a means to make a living or merely as a hobby?
- If you want to start a band, what do you want to stand for? Ask yourself…What type of music do I want to create? What influences will I blend together to create my sound? Will I also write the lyrics or serve as a backdrop for someone else?
- What areas of guitar have I yet to explore and discover? If you think you already know the guitar, chances are you’re dead wrong. Will you merely learn the same thing over and over again, or expand and become a more versatile performer?
True art simply comes down to something that is a little unique and different from what everyone else is doing. If you really want to challenge yourself, you need to explore the guitar at all levels of it’s existence. Say you like country music…what’s stopping you from learning to play the blues? What’s stopping you from playing heavy metal?
Challenge yourself, because it’s likely the only source that actually wants you to succeed is you. If you don’t believe in yourself, than who will? If you really want to become a great guitarist, consider these lifestyle choices:
- Surround yourself with good musicians. You’re a product of your environment. If you meet other successful guitarists, not only will you share a common interest but you’ll also find a source of inspiration and motivation.
- Jam out to music. This may sound easy, but you need to make a promise that you’ll listen to music in the right way. How do you listen to music in the right way? You explore all genres of music, learn what makes each genre special, and find ways to sprinkle those sounds into your own band.
- Connect with a complete beginner on the guitar. Not only will this “novice” think you’re a stud, but it will also help reaffirm your knowledge in the instrument. Keep in mind that even advanced guitarists need to go back to the basics from time to time.
- Practice Wisely. I would say, “practice makes perfect,” but that’s an over-used cliché. The bottom line is that you need to practice consistently while also using that time wisely. Once you have become an intermediate to advanced guitarist, consider taking a little time out of each practice session to learn and try something new. Slowly develop those news skills into your arsenal.
- Don’t be afraid to go against the grain. It’s important to learn and “borrow” from others, however at the end of the day you need your own sound. Like snowflakes, there are no two guitarists in the world who are the same. Embrace that and find your own style. You don’t have to follow everything “by the book.”
- Believe in yourself. If you don’t, than who will? Have you ever noticed that a lot of the most popular guitarists in the world are not only very gifted but also supremely confident. It’s not an accidental coincidence.
- Last but not least, work through your weaknesses. Every great musician still lacks talent in certain areas. It’s important to not only learn your strengths but also your weaknesses.
While all of the above is very important, I still personally feel that the old cliché of “you’re never too old to learn” is quite possibly the most important thing you’ll ever learn while playing a music instrument. Advanced guitarists, you don’t know it all. You can still learn through a wide variety of online courses, DVD videos, and personal instructors which are predicated toward the “intermediate to advance” guitarist.
Posted in Guitar | No Comments »
Sunday, March 7th, 2010
Despite what some may say, the acoustic guitar is still alive and well. Sure, it may seem like 75% of the guitar content online is related to the electric guitar, however the acoustic guitar still have a special niche audience. Several of the beginner guitar lessons and information posted online can cross-over regardless of whether you play on electric or acoustic guitar. However, there are a few minor differences (JamPlay and Jamorama both do a very nice job of explaining the differences).
A question that is commonly asked about acoustic guitars is what guitar scales are suited for the beginner player?
The best way to understand musical scales is to learn them in the context of keys. Learning the keys will allow you to see how everything works and fits together in this special little universe we call music. The most popular musical scale for beginners to learn is called the pentatonic scale. The pentatonic scale is a musical scale with five pitches per octave in contrast to a heptatonic (seven note) scale such as the major scale. The scale is very popular and widely used in pop music, rock music and especially in blues.
Major Pentatonic Scale
The shape of the scale is symmetric, and therefore very easy to visualize. Anhemitonic pentatonic scales, do not contain semitones and can be constructed in many ways. One example of the scale takes five consecutive pitches from the circle of fifths; starting on C, these are C, G, D, A, and E. Transposing the pitches to fit into one octave rearranges the pitches into the major pentatonic scale: C, D, E, G, A, C. This common scale is found in the opening bars of “My Girl” by The Temptations.
Another construction works backward: It omits two pitches from a diatonic scale. If we were to begin with a C major scale, for example, we might omit the fourth and the seventh scale degrees, F and B. The remaining notes, C, D, E, G, and A, are transpositionally equivalent to the black keys on a piano keyboard: G-flat, A-flat, B-flat, D-flat, and E-flat.
Omitting the third and seventh degrees of the C major scale obtains the notes for another transpositionally equivalent anhemitonic pentatonic scale: {F,G,A,C,D}. Omitting the first and fourth degrees of the C major scale gives a third anhemitonic pentatonic scale: {G,A,B,D,E}.
Minor Pentatonic Scale
Although various hemitonic pentatonic scales might be called minor, the term is most commonly applied to the relative minor pentatonic derived from the major pentatonic, using scale tones 1, 3, 4, 5, and 7 of the natural minor scale. The C minor pentatonic would be C, E-flat, F, G, B-flat. The A minor pentatonic, the relative minor of C, would be the same tones as C major pentatonic, starting on A, giving A, C, D, E, G. This minor pentatonic contains all three tones of an A minor triad.
Songs on the minor pentatonic scale include the popular Canadian folk song “Land of the Silver Birch”. Because of their simplicity, pentatonic scales are often used to introduce children to music.
As with all scales, you must first practise slowly and then gradually progress after you have memorised the scale. If you find that acoustic guitar scales are difficult and quite challenging at first, please understand that learning acoustic guitar scales are challenging and difficult in the early stages, but become entirely normal over time. You are trying to unlock the ability to express yourself musically through a scale and this process is always a challenge at first.
Other Acoustic Guitar Scales recommended for beginners: The Major Scale, Harmonic Minor, and Melodic Minor
Posted in Guitar, Scales | No Comments »
|